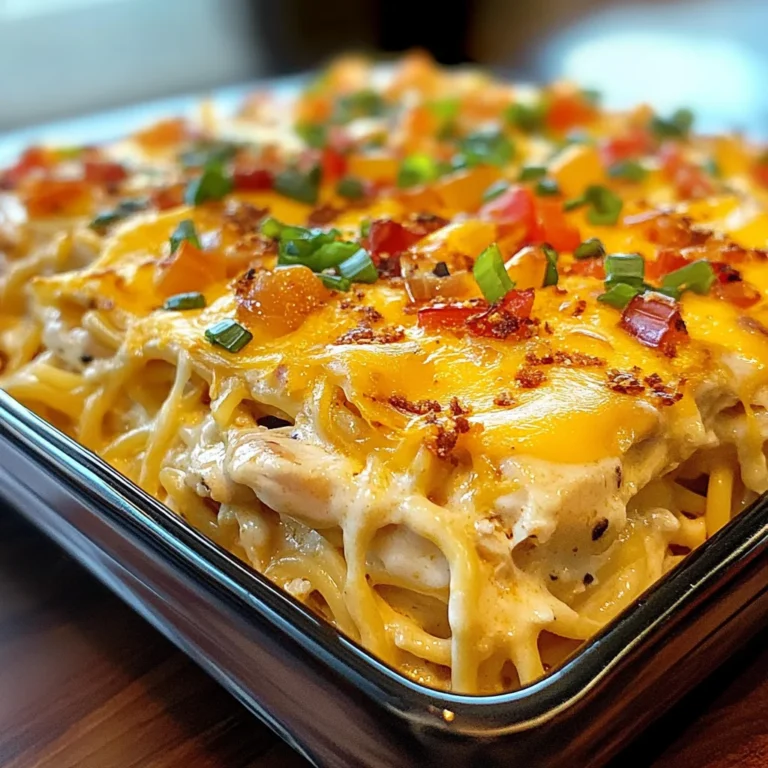
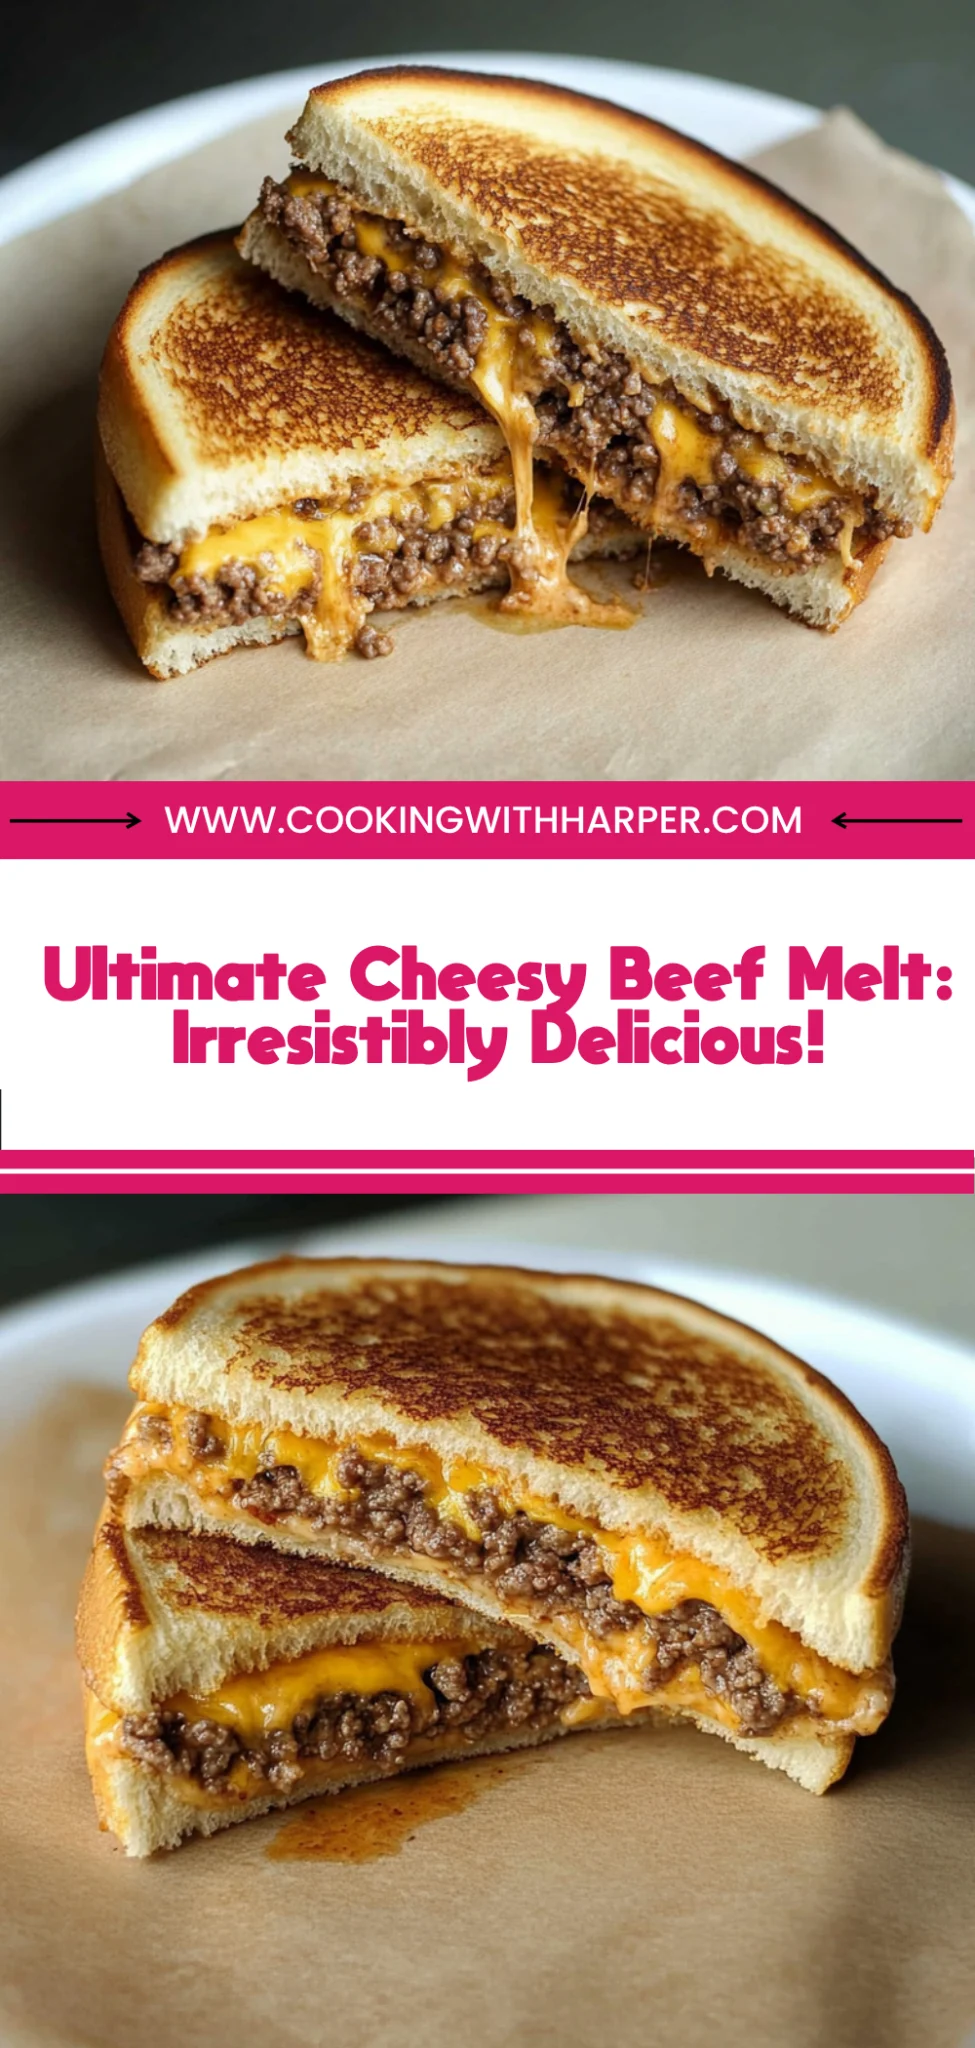
Ultimate Cheesy Ground Beef Melt: Comfort Food Bliss
Imagine sinking your teeth into the Ultimate Cheesy Ground Beef Melt, where the rich, savory aroma of perfectly seasoned ground beef mingles with the irresistible scent of melting cheese. Each bite offers a delightful contrast of textures: a crispy exterior that gives way to a warm, gooey interior, making it an ideal comfort food for those cozy weeknight dinners or when you crave a gourmet feel right at home.
What truly elevates this dish is the careful blend of spices that infuses every layer with robust flavor, complemented by a generous topping of your favorite cheese that stretches tantalizingly as you pull apart each serving. Perfect for sharing with loved ones or savoring solo, this melt promises to quickly become a cherished staple in your kitchen repertoire.
Why You’ll Love This Ultimate Cheesy Ground Beef Melt
This Ultimate Cheesy Ground Beef Melt is a game-changer for your dinner table, with its rich blend of flavors and textures that will leave you craving more. The 80/20 ground beef mixture provides a juicy foundation, enhanced by aromatic garlic and onion powders that elevate each bite. Topped with an irresistible combination of cheddar, Monterey Jack, and cream cheese, the melt achieves a creamy, gooey finish that contrasts perfectly with the crispy thick slices of bread. With the delightful kick from the ketchup and mustard, every mouthful is a savory explosion that promises to satisfy even the heartiest appetites. Get ready to indulge in this cheesy masterpiece that’s sure to become a household favorite!
What Kind of Ground Beef Should I Use?
For the Ultimate Cheesy Ground Beef Melt, I recommend using an 80/20 ground beef blend, which consists of 80% lean meat and 20% fat. This ratio strikes a perfect balance between flavor and moisture, ensuring your melt is both juicy and rich. The fat content helps to keep the meat tender during cooking, allowing it to absorb the savory seasonings like garlic and onion powders beautifully. If you prefer a leaner option, such as ground turkey or chicken, be aware that these alternatives may dry out more quickly; you might want to add a little olive oil or extra moisture to compensate for the lower fat content.
Ingredients for the Ultimate Cheesy Ground Beef Melt
Each ingredient in this dish plays an essential role in flavor and texture. Here’s what you’ll need:
- 1 lb Ground Beef (80/20 blend for best flavor): Provides a rich and juicy base with fantastic flavor.
- 1 tsp Garlic Powder: Infuses the beef with aromatic depth and warmth.
- 1 tsp Onion Powder: Adds savory sweetness that enhances the overall taste profile.
- 1 tsp Salt (to taste): Elevates all the flavors and balances richness.
- 1/2 tsp Black Pepper (freshly ground): Introduces a subtle heat that complements the dish.
- 1 cup Cheddar Cheese (shredded): Melts beautifully to create a sharp, tangy layer of flavor.
- 1 cup Monterey Jack Cheese (shredded): Offers creaminess and helps bind the cheesy topping together.
- 1/2 cup Cream Cheese (softened): Adds velvety texture and richness that makes it irresistible.
- 4 slices Thick Sliced Bread (such as Texas toast or sourdough): Serves as the hearty foundation, perfect for holding all the delicious toppings.
- 1/4 cup Ketchup: Brings sweetness and acidity to balance the richness of the cheese and meat.
- 1/4 cup Mustard: Adds a zesty kick that brightens up the flavors in each bite.
How To Make the Ultimate Cheesy Ground Beef Melt
Brown the Beef
In a skillet over medium heat, add 1 lb of ground beef and cook until it is browned. Use a spatula to break the meat apart as it cooks, ensuring even browning. This should take about 7-10 minutes. Once browned, drain any excess fat from the skillet, then stir in 1 tsp of garlic powder, 1 tsp of onion powder, 1 tsp of salt, and 1/2 tsp of freshly ground black pepper for added flavor.
Combine the Cheeses
In a mixing bowl, combine 1 cup each of shredded cheddar cheese and Monterey Jack cheese with 1/2 cup of softened cream cheese. Mix thoroughly until all cheeses are well incorporated and form a creamy blend. This mixture will create a rich and gooey topping for your melts.
Preheat the Oven
Before assembling your melts, preheat your oven to 375°F (190°C). This step is crucial for achieving that perfectly bubbly cheese and golden-brown bread once everything is baked together.
Spread Condiments
Take four slices of thick sliced bread and spread 1/4 cup of ketchup and 1/4 cup of mustard on one side of each slice. Make sure to cover the surface evenly for an extra layer of flavor that complements the savory beef and cheese filling.
Layer the Beef and Cheese
On the unspread side of two slices of bread, layer the seasoned ground beef mixture generously. Then, top each with the creamy cheese mixture you prepared earlier. Ensure an even distribution to maximize cheesy goodness in every bite.
Assemble the Sandwiches
Place the remaining two slices of bread on top of your layered beef and cheese, spread side up. Press down slightly to help hold everything together during baking. This step helps create a cohesive melt that holds its shape while cooking.
Bake Until Golden
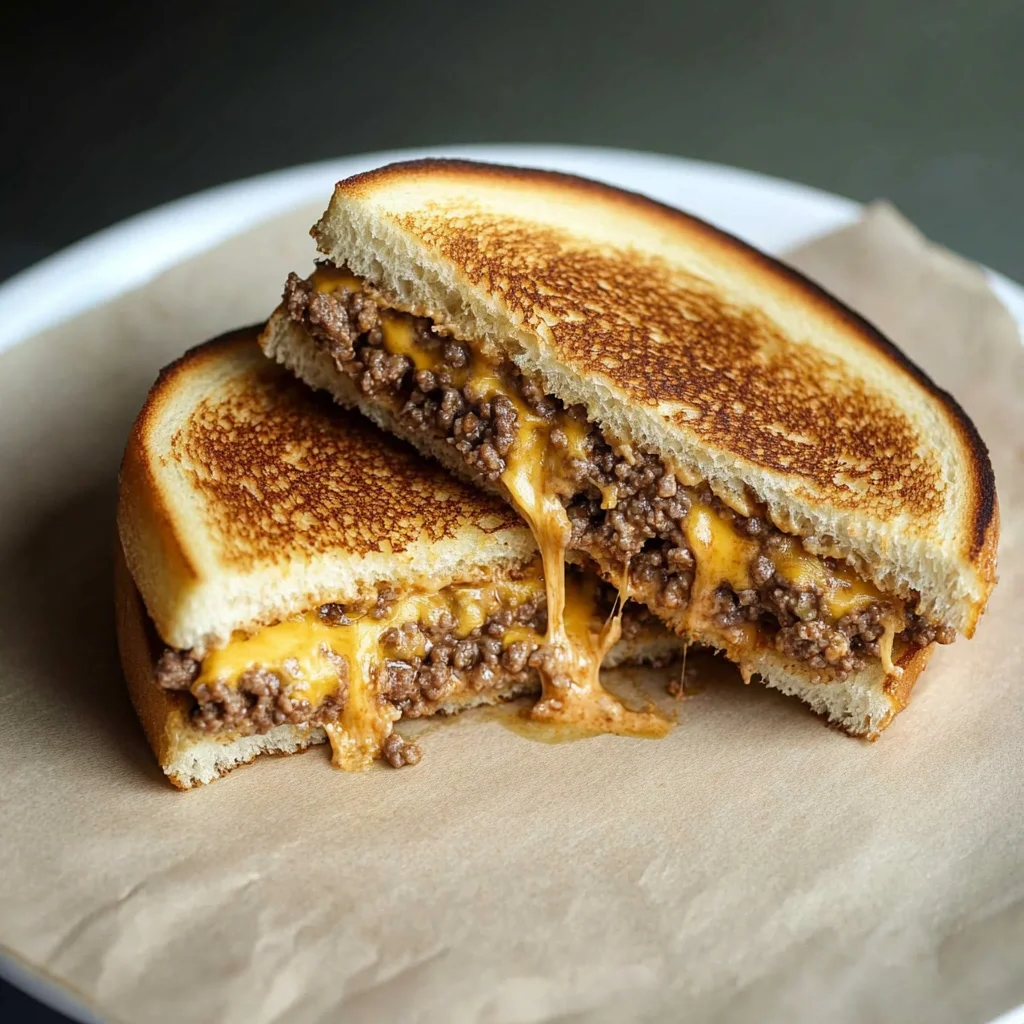
Transfer the assembled melts into a baking dish and place them in your preheated oven. Bake for approximately 15-20 minutes or until the cheese is bubbly and the bread turns deeply golden brown. Keep an eye on them to prevent burning; you’ll know they’re done when you see that delightful bubbling action from underneath the melted cheese.
Cool and Slice
Once baked to perfection, carefully remove the melts from the oven using oven mitts. Allow them to cool for a few minutes before slicing into quarters or halves, depending on your serving preference. This brief cooling period helps set the layers, making it easier to enjoy every cheesy bite without burning your mouth!
How to Serve and Store Ultimate Cheesy Ground Beef Melt
This Ultimate Cheesy Ground Beef Melt yields 4 hearty servings that are perfect for a cozy dinner or casual gathering. To serve, place the cheesy melt on a plate with a side of crispy oven-baked fries or a refreshing coleslaw, which will soak up the savory juices beautifully. For an extra touch, drizzle some ketchup and mustard on the side for dipping, allowing each bite to be bursting with flavor.
To store leftovers, transfer them to an airtight container and refrigerate for up to 3 days. When reheating, add a splash of broth to the ground beef mixture before warming it gently over low heat to maintain its moisture and creamy texture. While this dish is best enjoyed fresh, it can be frozen; however, expect some texture changes in the bread after thawing.
What to Serve With Ultimate Cheesy Ground Beef Melt
Garlic Mashed Potatoes
Creamy and buttery, garlic mashed potatoes provide a rich contrast that enhances the savory flavors of the cheesy ground beef melt.
Roasted Broccoli
The slightly charred, tender florets of roasted broccoli add a delightful crunch and a touch of bitterness that balances the dish’s richness.
Crispy French Fries
Golden, crispy French fries are the perfect vessel for scooping up melted cheese and beef, making every bite even more indulgent.
Classic Coleslaw
The refreshing crunch and tangy dressing of coleslaw cut through the heaviness of the melt, offering a bright flavor contrast.
Cheesy Garlic Bread
This irresistible side not only complements the cheesy goodness of the melt but also provides an extra layer of gooeyness that cheese lovers will adore.
Sweet Potato Wedges
Sweet potato wedges bring a hint of natural sweetness that beautifully contrasts with the savory beef and cheese while adding a satisfying texture.
Can I use ground turkey instead of ground beef? Yes, you can substitute ground turkey for ground beef in this recipe. Just keep in mind that turkey may have a slightly different flavor and texture, so you might want to add a bit more seasoning to enhance its taste.
Is there a dairy-free alternative for the cheese? Absolutely! You can use dairy-free cheese options available in stores, such as cashew cheese or almond-based cheese shreds. Make sure to check the ingredients to ensure they fit your dietary needs.
Can I prepare the melts ahead of time and freeze them? Yes, you can assemble the melts ahead of time and freeze them before baking. Just wrap them tightly in plastic wrap or aluminum foil, and when you’re ready to enjoy, bake them directly from frozen, adding a few extra minutes to the cooking time.
How can I make the melts spicier? To add some heat, consider mixing in diced jalapeños or crushed red pepper flakes into the beef mixture before assembling. This will give your Ultimate Cheesy Ground Beef Melt a delicious kick!
Do I need to use thick sliced bread? While thick sliced bread like Texas toast or sourdough works best for this recipe, you can use regular sandwich bread if that’s what you have on hand. Just be mindful that thinner bread may get soggier from the beef and cheese mixture.
Wrapping It Up
The Ultimate Cheesy Ground Beef Melt is not just a meal; it’s a celebration of flavor and comfort that will leave everyone at the table smiling. For more delicious options, be sure to try [Savory Bacon Cheeseburger Casserole] or [Loaded Nacho Pasta] to keep the good times rolling. We’d love for you to save this recipe on Pinterest and share your own tasty results with our community in the comments!
Ultimate Cheesy Ground Beef Melt
Ingredients
Method
- In a skillet over medium heat, add the ground beef and cook until browned, breaking it apart with a spatula.
- Drain excess fat, then stir in garlic powder, onion powder, salt, and black pepper.
- In a bowl, combine cheddar cheese, Monterey Jack cheese, and softened cream cheese until well mixed.
- Preheat the oven to 375°F (190°C).
- Spread ketchup and mustard on one side of each slice of bread.
- Layer the beef mixture on the unspread side of two slices of bread, then top with the cheese mixture.
- Top with the remaining slices of bread, spread side up.
- Place the assembled melts in a baking dish and bake in the preheated oven for 15-20 minutes, or until the cheese is bubbly and the bread is golden brown.
- Remove from the oven and let cool for a few minutes before slicing.