Cheesy Taco Sticks: Ultimate Comfort Food Delight
Imagine sinking your teeth into a golden, crispy exterior that gives way to a warm, gooey center of seasoned beef and melted cheese. The enticing aroma of spices wafts through the air, igniting cravings for comfort food that’s as satisfying as it is indulgent. Cheesy Taco Sticks are not just a tasty snack; they embody the spirit of gathering with friends and family, making any occasion feel special.
What elevates these delectable sticks is the perfect balance of flavors that come together through a simple yet effective technique—seasoning the beef just right and allowing the cheese to melt into every crevice. Served with a side of zesty salsa or creamy guacamole, these Cheesy Taco Sticks invite you to share in their deliciousness, creating moments of joy and connection around the table. Dive in and savor every bite!
Why You’ll Love This Cheesy Taco Sticks
These Cheesy Taco Sticks are a game changer for your snack and appetizer repertoire, combining the rich flavors of seasoned beef with the creamy goodness of melted cheddar cheese that oozes out with each bite. The flaky, golden crescent roll dough provides a delightful contrast in texture, making every mouthful an irresistible experience. Plus, the addition of refried beans not only enhances the dish’s heartiness but also adds a layer of savory depth that perfectly complements the vibrant spices of taco seasoning. Serve them warm alongside cool sour cream and zesty salsa for a burst of flavor that will keep your taste buds dancing. Trust me, these cheesy delights are so tempting you’ll want to whip them up tonight!
What Kind of Beef Should I Use?
For the Cheesy Taco Sticks, ground beef is the ideal choice due to its rich flavor and perfect fat content, which ensures a juicy filling that complements the spices in taco seasoning. Using 80/20 ground beef strikes the right balance between flavor and moisture, making the sticks deliciously savory and satisfying. If you prefer a leaner option, ground turkey is a great alternative; just be aware that it may require a little extra seasoning since it tends to be milder in taste. If using turkey, consider adding a touch more taco seasoning or incorporating some olive oil to maintain moisture during cooking.
Ingredients for the Cheesy Taco Sticks
Each ingredient in this dish plays an essential role in flavor and texture. Here’s what you’ll need:
1 lb ground beef (or turkey): Provides savory richness and a hearty base.
1 packet taco seasoning: Infuses the filling with zesty, bold flavors.
1 cup shredded cheddar cheese: Melts beautifully to create a gooey, cheesy goodness.
1 cup refried beans: Adds creaminess and helps bind the filling together.
1 package refrigerated crescent roll dough: Serves as a flaky, buttery outer layer that encases the filling.
1 cup sour cream (for serving): Offers a cool, tangy contrast to the warm sticks.
- 1 cup salsa (for serving): Brings freshness and a kick of spice to complement each bite.
Step-by-Step: How to Make Cheesy Taco Sticks

Brown the Beef
In a skillet over medium heat, add the ground beef and cook until it is browned and crumbly. This should take about 6-8 minutes. Be sure to drain any excess fat after cooking to keep your filling from becoming greasy.
Mix in Seasonings
Once the beef is browned, stir in the taco seasoning and refried beans. Continue mixing until everything is well combined and heated through, which should take about 2-3 minutes. Remove the skillet from heat when the mixture is fragrant and slightly thickened.
Preheat the Oven
While preparing your filling, preheat your oven to 375°F (190°C). This step ensures that your Cheesy Taco Sticks will bake evenly and reach that ideal golden brown color.
Prepare the Dough
Unroll the refrigerated crescent roll dough on a clean surface and separate it into individual triangles. Be gentle as you work with the dough to prevent tearing, ensuring each piece is intact for wrapping around your filling.
Fill Each Triangle
On the wide end of each triangle, place a spoonful of the beef mixture followed by a sprinkle of shredded cheddar cheese. Make sure not to overfill them; about 1-2 tablespoons of filling should be sufficient to allow for easy rolling without spilling out.
Roll and Seal
Starting from the wide end, carefully roll each triangle towards the tip, sealing the edges as you go. Ensure that they are tightly rolled but not overly stretched; this will help them hold their shape during baking.
Arrange for Baking
Place your rolled taco sticks on a baking sheet lined with parchment paper, making sure they are spaced apart to allow for even cooking. This spacing helps promote air circulation so they can bake properly without getting soggy.
Bake Until Golden
Bake in the preheated oven for 12-15 minutes or until they turn deeply golden brown. Keep an eye on them toward the end of baking; when they are golden and puffed up, they are ready to come out.
Cool Slightly Before Serving
Once baked, remove the Cheesy Taco Sticks from the oven and let them cool for a few minutes on a wire rack or serving platter. This cooling time allows them to set slightly, making them easier to handle.
Serve with Dips
Serve your Cheesy Taco Sticks warm alongside sour cream and salsa for dipping. The creamy contrast of sour cream complements the cheesy filling beautifully, while salsa adds a refreshing kick that enhances every bite.
How to Serve and Store Cheesy Taco Sticks
These Cheesy Taco Sticks make for four satisfying servings, perfect for sharing with family or friends. For an appetizing presentation, serve them on a colorful platter alongside bowls of sour cream and salsa for dipping. You can also pair them with a fresh garden salad or some crunchy tortilla chips to complement their cheesy goodness and soak up the delicious sauces.
To store any leftovers, place them in an airtight container in the fridge, where they will stay fresh for up to three days. When reheating, avoid the microwave if possible; instead, warm them in the oven at 350°F for about 10 minutes to maintain their crispy texture. If you have leftover beef filling, consider adding a splash of broth while reheating to keep it moist and flavorful. While these taco sticks are best enjoyed fresh, they can be frozen for later use, although the texture may change slightly upon thawing.
What to Serve With Cheesy Taco Sticks
Mexican Street Corn Salad
This vibrant salad, with its creamy dressing and zesty lime, provides a refreshing contrast to the rich flavors of cheesy taco sticks.
Cilantro Lime Rice
The light and zesty profile of cilantro lime rice offers a bright counterpoint that complements the savory beef and cheese filling perfectly.
Guacamole
Creamy guacamole adds a luxurious texture and a hint of freshness that enhances the overall flavor experience of the cheesy taco sticks.
Garlic Bread
Buttery garlic bread brings an irresistible crunch and aromatic punch that pairs delightfully with the cheesy and meaty elements of the dish.
Roasted Sweet Potatoes
Sweet potatoes, with their caramelized edges and natural sweetness, create a delightful balance against the savory, seasoned filling of the taco sticks.
Spinach Salad with Avocado
A fresh spinach salad adorned with creamy avocado delivers a healthy crunch that beautifully contrasts the richness of cheesy taco sticks.
Frequently Asked Questions
Can I use ground turkey instead of ground beef? Yes, ground turkey is a great substitute for ground beef in this recipe. It will provide a lighter option while still delivering delicious flavor when seasoned with the taco seasoning and mixed with the refried beans.
Are these Cheesy Taco Sticks gluten-free? Unfortunately, traditional crescent roll dough contains gluten, making this recipe not suitable for a gluten-free diet. However, you can use gluten-free crescent roll dough or puff pastry as an alternative to keep the dish gluten-free.
Can I prepare the filling ahead of time? Absolutely! You can cook the beef mixture in advance and store it in the refrigerator for up to 3 days. Just reheat it before assembling your taco sticks for an easy snack or appetizer.
How do I know when my Cheesy Taco Sticks are done baking? They are done when they turn golden brown, which typically takes about 12-15 minutes at 375°F (190°C). Keep an eye on them towards the end of baking to achieve that perfect crispy texture.
What other toppings can I add to these taco sticks? Feel free to get creative with toppings! You can add sliced jalapeños for heat, guacamole for creaminess, or even diced tomatoes and lettuce for freshness. Adjusting the toppings can elevate the flavor profile to your liking.
Final Thoughts
Cheesy Taco Sticks are not just a delightful snack; they bring together the comforting flavors of seasoned beef and gooey cheese, making them a hit for any gathering. If you’re craving more tasty treats, be sure to check out [Spicy Nacho Cheese Dip] or [Mini Taco Cups] for similar flavor-packed fun. We’d love to see how your Cheesy Taco Sticks turn out, so don’t forget to share your creations with us on Pinterest!
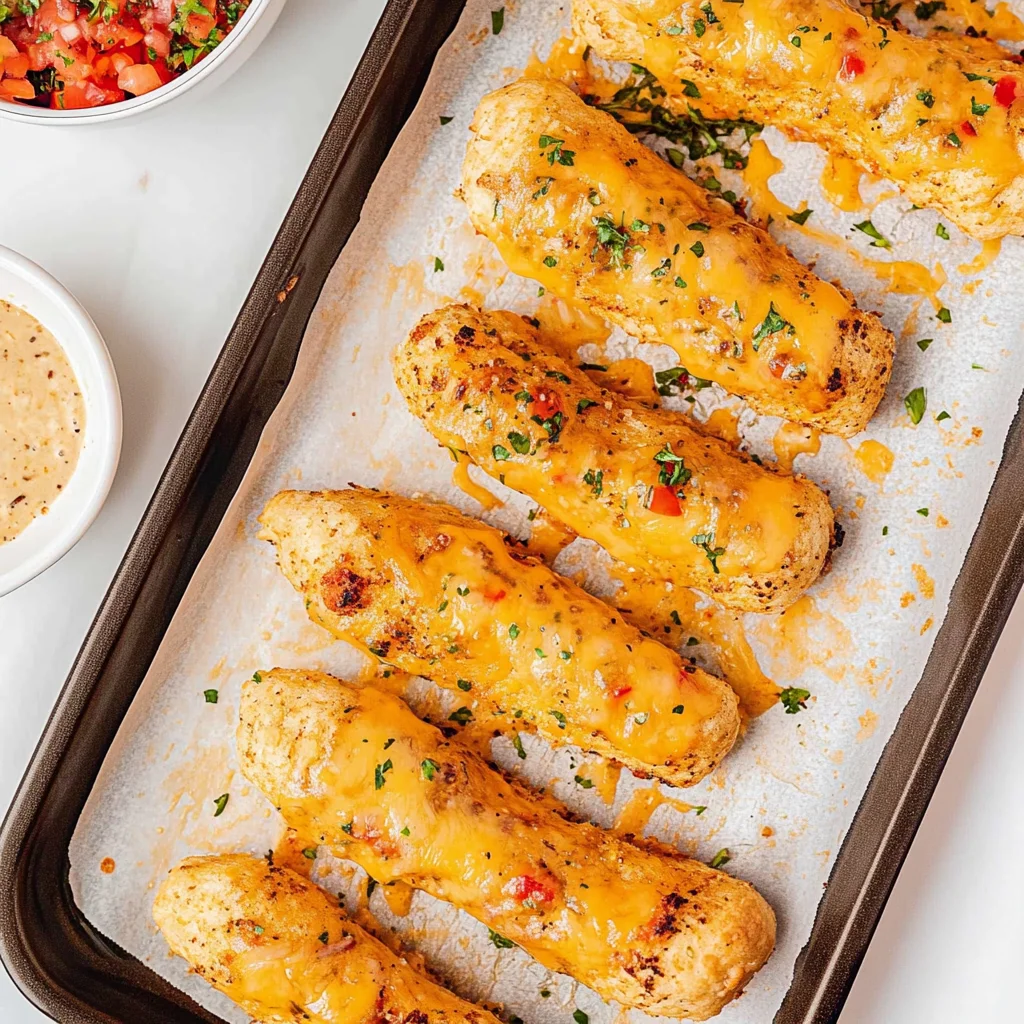
Cheesy Taco Sticks
Ingredients
Method
- In a skillet over medium heat, cook the ground beef until browned. Drain excess fat.
- Add taco seasoning and refried beans to the skillet, stirring until well combined. Remove from heat.
- Preheat the oven to 375°F (190°C).
- Unroll the crescent roll dough and separate it into triangles.
- Place a spoonful of the beef mixture and a sprinkle of cheddar cheese on the wide end of each triangle.
- Roll the dough from the wide end to the tip, sealing the edges.
- Place the rolled sticks on a baking sheet lined with parchment paper.
- Bake in the preheated oven for 12-15 minutes or until golden brown.
- Remove from oven and let cool slightly before serving.
- Serve with sour cream and salsa on the side.