Peanut Butter Butterfinger Cookies
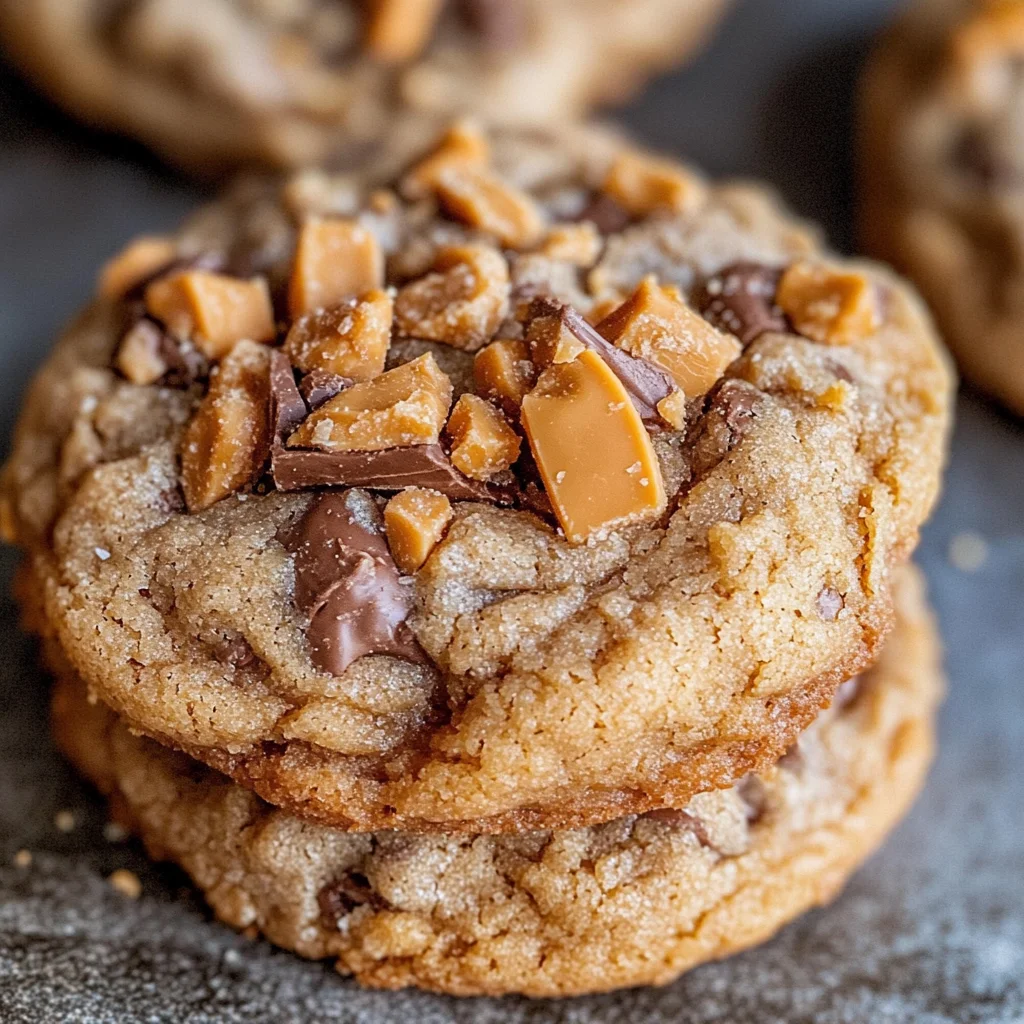
If you’re looking for a cookie that brings joy to every bite, look no further than these Peanut Butter Butterfinger Cookies! This recipe is a crowd-pleaser and has become a staple in my home. The combination of rich peanut butter and crunchy Butterfinger bits creates a delightful treat that’s perfect for any occasion—be it a busy weeknight or a festive family gathering. Trust me, once you try them, you’ll understand why these cookies have earned a special place in my heart!
Baking these cookies is not only simple but also incredibly rewarding. They make your kitchen smell heavenly, and I promise they’ll disappear faster than you can say “cookie jar”!
Why You’ll Love This Recipe
- Easy to make: With just a few simple steps, you can whip up these cookies in no time!
- Family-friendly: Everyone—from kids to adults—will adore the sweet peanut buttery flavor and crunchy bits.
- Make-ahead convenience: The dough can be prepared ahead of time, allowing for fresh baked cookies whenever the craving strikes.
- Freezer friendly: Bake a batch now and freeze some for later; they taste just as delicious after being frozen!
- Irresistible flavor: The combination of peanut butter and Butterfinger creates a taste that’s simply unforgettable.
Ingredients You’ll Need
Making these Peanut Butter Butterfinger Cookies requires very few ingredients, all of which are simple and wholesome. Gather the following items to get started:
- 3/4 cup butter (softened (1 and 1/2 sticks))
- 1/2 cup granulated sugar
- 1/2 cup brown sugar (packed)
- 1 cup peanut butter (don’t use natural pb)
- 1 large egg
- 1 & 1/2 teaspoons vanilla
- 1 & 1/2 cups all-purpose flour (spooned and leveled)
- 1/2 teaspoon baking soda
- 1/2 teaspoon baking powder
- 1/4 teaspoon kosher salt
- 16 ounces Butterfinger (chopped, see note)
Variations
This recipe is quite flexible, so feel free to get creative! Here are some fun variations to consider:
- Add chocolate chips: For an extra chocolatey twist, fold in some semi-sweet chocolate chips along with the Butterfinger bits.
- Use different candy bars: Swap in your favorite candy bars—Snickers or Reese’s could add a whole new flavor profile!
- Make it gluten-free: Substitute all-purpose flour with your favorite gluten-free blend for a tasty alternative.
- Try different nut butters: If you’re feeling adventurous, almond butter or cashew butter can give this cookie a unique spin.
How to Make Peanut Butter Butterfinger Cookies
Step 1: Cream the Butter and Sugars
In a large bowl or stand mixer, beat 3/4 cup softened butter until it’s smooth and creamy. It’s important to scrape down the sides of the bowl as you go; this ensures all the butter gets well mixed. Next, add 1/2 cup granulated sugar and 1/2 cup packed brown sugar. Beat this mixture for about two minutes until fluffy—this step helps create light and airy cookies!
Step 2: Add Peanut Butter and Egg
Now it’s time for the star ingredient: add in 1 cup of peanut butter. I personally recommend Jif for its creamy texture! Follow that with 1 large egg and 1 & 1/2 teaspoons of vanilla extract. Beat everything together until well combined—this adds depth to our cookie flavor.
Step 3: Mix Dry Ingredients
Next, spoon out 1 & 1/2 cups of all-purpose flour into your measuring cup and level it off before adding it to the bowl. On top of the flour, add 1/2 teaspoon baking soda, 1/2 teaspoon baking powder, and 1/4 teaspoon kosher salt without mixing just yet. Gently stir together these dry ingredients with a teaspoon so they’re combined without overmixing.
Step 4: Combine Wet and Dry Ingredients
Turn on your mixer at low speed to combine everything into dough. Be careful not to overdo it—stop mixing when you still see some flour visible. This helps keep your cookies tender!
Step 5: Fold in the Butterfinger Bits
Now comes the fun part! Add in those delightful chopped-up Butterfingers (16 ounces) and mix them until they’re just incorporated into your dough. Try not to crush them too much; we want those crunchy bits!
Step 6: Chill the Dough
Cover the bowl with plastic wrap or a lid and chill your dough for at least 15 minutes or up to an hour if you can resist eating it right away! Chilling helps develop flavor while making it easier to scoop.
Step 7: Shape the Cookies
Preheat your oven to 350 degrees F while you shape your chilled dough into balls about two inches wide. Place them on lined baking sheets with enough space between each cookie to allow for spreading.
Step 8: Bake Away!
Bake those beauties at 350 degrees F for around ten minutes. You’ll know they’re ready when their edges are set but they still look slightly puffy in the middle—trust me on this one!
Step 9: Cool Down
Allow cookies to set up on their pan for about five minutes before transferring them onto a wire rack to cool completely. Remember, I recommend waiting until they’re closer to room temperature before diving in—the texture is just perfect then!
Enjoy making these delectable Peanut Butter Butterfinger Cookies! They truly are an irresistible treat that will surely bring smiles all around.
Pro Tips for Making Peanut Butter Butterfinger Cookies
Baking can be an adventure, and with these tips, you’ll ensure your Peanut Butter Butterfinger Cookies turn out perfectly every time!
- Use room temperature butter: Starting with softened butter creates a creamier texture and helps incorporate air, making your cookies lighter and fluffier.
- Don’t skip the chilling step: Chilling the dough allows the flavors to meld and helps prevent spreading during baking, resulting in thicker cookies.
- Measure flour correctly: Spoon the flour into your measuring cup and level it off. This prevents overpacking, which can lead to dry cookies.
- Adjust baking time based on your oven: Every oven is different! Keep an eye on your cookies as they bake; if they’re not golden around the edges after 10 minutes, give them a minute or two longer.
- Let cookies cool completely before storing: This ensures they don’t become soggy from residual heat. A wire rack promotes airflow and preserves that delightful texture.
How to Serve Peanut Butter Butterfinger Cookies
These cookies are not just delicious but also visually appealing. Present them beautifully to make any occasion special!
Garnishes
- Chopped peanuts: Sprinkle some chopped peanuts on top of the cookies before serving for extra crunch and a delightful nutty flavor.
- Chocolate drizzle: A simple drizzle of melted chocolate adds an elegant touch and enhances that sweet peanut butter flavor.
Side Dishes
- Vanilla ice cream: Serve alongside a scoop of vanilla ice cream for a classic dessert pairing that balances the cookie’s richness with creamy sweetness.
- Fresh fruit salad: A light fruit salad brings freshness to the table, offering a refreshing contrast to the decadent cookies.
- Milk or plant-based milk: The ultimate pairing! A cold glass of milk is perfect for dipping and complements the cookie’s flavors beautifully.
- Coffee or tea: Enjoying these cookies with a warm cup of coffee or herbal tea can elevate your dessert experience, making it cozy and comforting.
With these serving suggestions, your Peanut Butter Butterfinger Cookies will be a hit at any gathering! Enjoy baking and sharing these delightful treats!

Make Ahead and Storage
These Peanut Butter Butterfinger Cookies are not only delicious but also perfect for meal prep! You can prepare the dough in advance, store it properly, and have fresh cookies ready whenever the craving strikes.
Storing Leftovers
- Store leftover cookies in a tightly sealed container at room temperature for up to 3 days.
- If you want to keep them longer, consider freezing them (see below).
Freezing
- To freeze cookie dough, shape it into balls and place them in a ziplock bag. Label the bag with the date.
- Freeze the cookie dough for up to 3 months. When you’re ready to bake, place the frozen dough on a baking sheet and add an extra minute or two to the baking time.
- You can also freeze baked cookies in a sealed container for up to 4 weeks. Let them thaw at room temperature before enjoying.
Reheating
- For reheating baked cookies, preheat your oven to 300°F (150°C).
- Place cookies on a baking sheet and warm them for about 5 minutes until they’re nice and soft again.
FAQs
Here are some common questions you may have about making these delightful cookies!
Can I make Peanut Butter Butterfinger Cookies without eggs?
Yes! You can substitute the egg with a flaxseed meal or applesauce. Use 1 tablespoon of flaxseed mixed with 2.5 tablespoons of water or 1/4 cup of applesauce for each egg.
How do I store Peanut Butter Butterfinger Cookies?
Store leftovers in a tightly sealed container at room temperature for up to 3 days. For longer storage, freeze them as outlined above!
Can I use natural peanut butter in Peanut Butter Butterfinger Cookies?
It’s best not to use natural peanut butter as it can affect the texture of the cookies. Stick with a creamy commercial brand like Jif for optimal results.
How do I know when my Peanut Butter Butterfinger Cookies are done baking?
The edges should be set while the center remains slightly puffy but not shiny. They will continue to firm up as they cool on the pan.
Final Thoughts
I truly believe these Peanut Butter Butterfinger Cookies are something special! The combination of soft, thick peanut butter goodness with crunchy Butterfinger bits creates an irresistible treat that’s perfect any time of day. I hope you enjoy making these as much as I do — they’re sure to bring smiles all around! Happy baking!
Peanut Butter Butterfinger Cookies
Indulge in the delightful taste of these Peanut Butter Butterfinger Cookies! This recipe brings together the rich creaminess of peanut butter and the irresistible crunch of Butterfinger bits, creating a cookie that’s sure to become a favorite. Perfect for any occasion, these cookies are easy to make and will fill your kitchen with a heavenly aroma. Whether you’re hosting a gathering or just craving something sweet, these treats promise joy in every bite. Plus, they’re freezer-friendly and can be made ahead of time for ultimate convenience.
- Prep Time: 20 minutes
- Cook Time: 10 minutes
- Total Time: 30 minutes
- Yield: About 24 cookies 1x
- Category: Dessert
- Method: Baking
- Cuisine: American
Ingredients
- 3/4 cup softened butter
- 1/2 cup granulated sugar
- 1/2 cup packed brown sugar
- 1 cup creamy peanut butter
- 1 large egg
- 1 & 1/2 teaspoons vanilla extract
- 1 & 1/2 cups all-purpose flour
- 1/2 teaspoon baking soda
- 1/2 teaspoon baking powder
- 1/4 teaspoon kosher salt
- 16 ounces chopped Butterfinger
Instructions
- Preheat your oven to 350°F (175°C).
- Cream together softened butter, granulated sugar, and brown sugar until fluffy.
- Add peanut butter, egg, and vanilla, mixing well until combined.
- In a separate bowl, mix flour, baking soda, baking powder, and salt.
- Gradually combine dry ingredients into the wet mixture until just incorporated.
- Gently fold in chopped Butterfinger bits.
- Chill dough for at least 15 minutes before shaping into two-inch balls.
- Place on lined baking sheets and bake for about ten minutes until edges are set.
- Allow cookies to cool on the pan for five minutes before transferring to a wire rack.
Nutrition
- Serving Size: 1 cookie (30g)
- Calories: 150
- Sugar: 10g
- Sodium: 90mg
- Fat: 8g
- Saturated Fat: 4g
- Unsaturated Fat: 3g
- Trans Fat: 0g
- Carbohydrates: 18g
- Fiber: 1g
- Protein: 3g
- Cholesterol: 15mg


