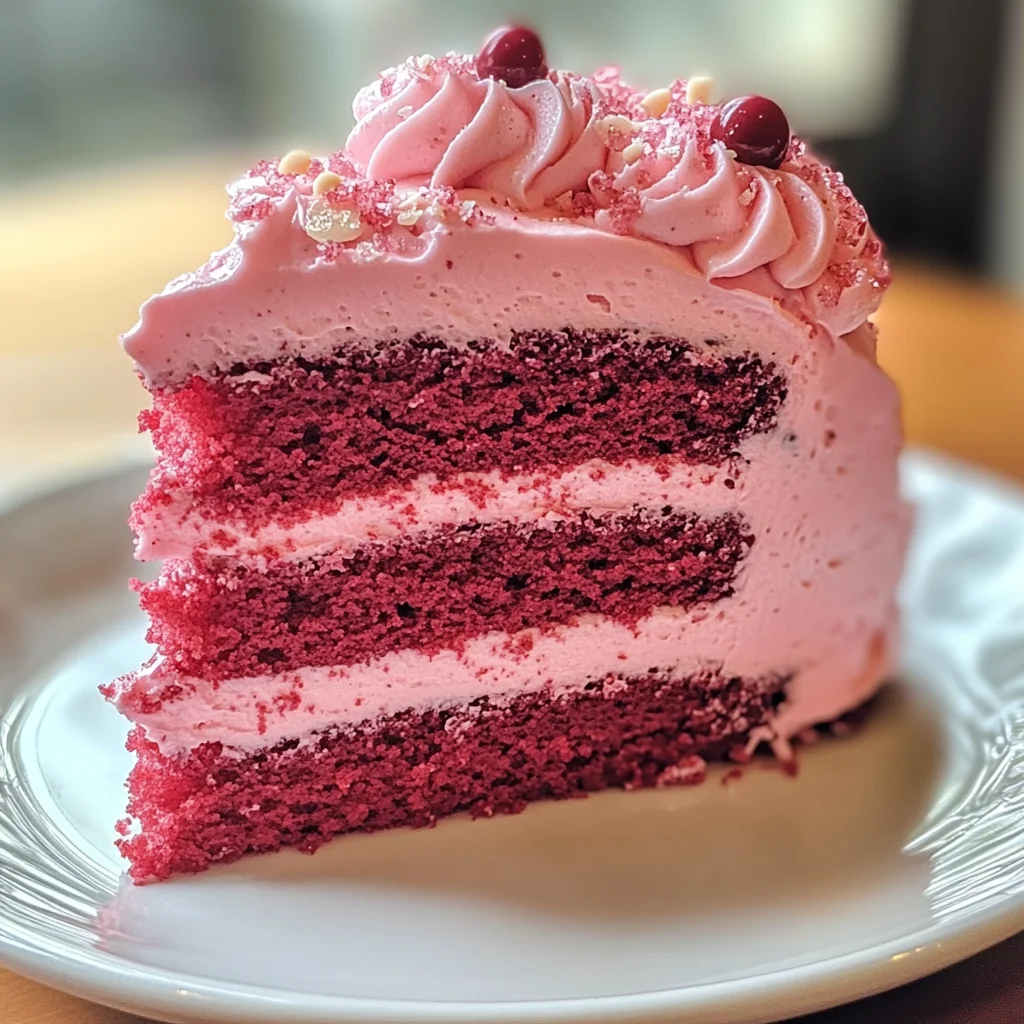
Mother’s Day Pink Velvet Cake
If you’re looking for a show-stopping dessert that will make your loved ones feel cherished, this Mother’s Day Pink Velvet Cake is just the thing! With its soft and fluffy layers, this cake combines the rich flavors of cocoa and vanilla to create a delightful treat that’s perfect for any celebration. Whether it’s Mother’s Day or simply a family gathering, this cake will surely bring smiles and sweet memories to all who taste it.
What makes this cake truly special is not only its beautiful pink hue but also the joy it brings when shared with those you care about. It’s a simple yet elegant dessert that can brighten up even the busiest weeknights or serve as a centerpiece for festive occasions. I promise, once you bake this cake, it’ll become a beloved recipe in your home.
Why You’ll Love This Recipe
- Easy to Make: This recipe requires just a few simple steps, making it accessible even for beginner bakers.
- Family-Friendly: Kids and adults alike adore the fluffy texture and sweet flavors of this cake.
- Perfect for Any Occasion: Whether it’s a holiday or just a weekend treat, this cake fits right in.
- Make-Ahead Delight: You can bake the layers in advance and frost them just before serving!
- Customizable Flavors: Feel free to add your own twist with flavor variations or fun toppings.
Ingredients You’ll Need
Gathering these ingredients is half the fun! You’ll find that they are simple and wholesome, making it easy to whip up this delightful cake right at home. Here’s what you’ll need:
For the Cake
- 2 ½ cups cake flour
- 1 ¾ cups granulated sugar
- ½ cup unsweetened cocoa powder
- 1 tbsp baking powder
- ½ tsp salt
- ¾ cup unsalted butter, softened
- 4 large eggs (room temperature)
- 1 cup buttermilk
- 2 tsp pure vanilla extract
- Red food coloring (to achieve desired pink hue)
For the Frosting
- Cream cheese frosting (for topping)
Variations
This recipe is wonderfully flexible! Here are some fun ways to customize your Mother’s Day Pink Velvet Cake:
- Swap the buttermilk: Use yogurt instead of buttermilk for a tangy twist that still keeps things moist.
- Add almond extract: A splash of almond extract can elevate the flavor profile and add a lovely aroma.
- Fresh fruit toppings: Decorate with fresh berries or sliced fruits for a refreshing contrast to the rich cake.
- Change up the frosting: Try using whipped cream or a chocolate ganache for an exciting variation!
How to Make Mother’s Day Pink Velvet Cake
Step 1: Preheat Your Oven
Start by preheating your oven to 350°F (175°C). Greasing and flouring two 9-inch round cake pans will ensure your cakes slide out easily after baking. This step is crucial because it prevents sticking and helps maintain those lovely layers.
Step 2: Mix Dry Ingredients
In a bowl, whisk together the cake flour, cocoa powder, baking powder, and salt. Combining these dry ingredients first ensures even distribution of flavors throughout your batter. Plus, it helps create that perfect fluffy texture!
Step 3: Cream Butter and Sugar
In another bowl, cream together your softened butter and sugar until light and fluffy—about three minutes should do it! This process incorporates air into your mixture, resulting in tender cakes that rise beautifully.
Step 4: Add Eggs One at a Time
Next, beat in your eggs one at a time. It’s important to ensure each egg is fully incorporated before adding the next one. This step helps build structure in your batter while keeping it smooth.
Step 5: Mix in Buttermilk and Vanilla
Now it’s time to add the buttermilk, vanilla extract, and red food coloring into your mixture. Mixing well until combined is key here; you want everything blended perfectly so that each slice has that stunning pink hue.
Step 6: Combine Wet and Dry Ingredients
Gradually fold in your dry ingredients until everything is smooth. Be gentle during this step—overmixing can lead to dense cakes instead of light ones!
Step 7: Divide Batter & Bake
Divide your batter evenly between your prepared pans. Bake for about 25-30 minutes or until a toothpick inserted into the center comes out clean. The smell wafting through your kitchen will be heavenly!
Step 8: Cool Your Cakes
Allow your cakes to cool in their pans for about ten minutes before transferring them to wire racks. Cooling properly prevents sogginess and allows them to set nicely.
Step 9: Frost & Enjoy!
Once completely cooled, frost with creamy cream cheese frosting. Take your time decorating; this is where you can really let your creativity shine!
There you have it—a stunning Mother’s Day Pink Velvet Cake ready to share with loved ones. Enjoy every bite!
Pro Tips for Making Mother’s Day Pink Velvet Cake
Baking can be a delightful experience, especially when you have a few tricks up your sleeve to ensure your cake turns out perfectly!
- Use Room Temperature Ingredients: Ensuring your eggs and buttermilk are at room temperature allows for better emulsification, resulting in a smoother batter and a fluffier cake.
- Don’t Overmix the Batter: Mixing too much after adding the dry ingredients can lead to a dense cake. Fold the ingredients gently until just combined to keep that light, airy texture.
- Check for Doneness Early: Ovens can vary in temperature. Start checking your cakes around 25 minutes; they should spring back when touched and a toothpick should come out clean.
- Let Cakes Cool Completely: Cooling the cakes completely before frosting prevents the frosting from melting and helps maintain neat layers, ensuring your cake looks as good as it tastes.
- Experiment with Food Coloring: The amount of red food coloring can be adjusted based on your preference for pink shades—go bold for bright pink or use less for a subtler hue.
How to Serve Mother’s Day Pink Velvet Cake
Presenting your Mother’s Day Pink Velvet Cake beautifully enhances its appeal and makes the occasion even more special. Here are some ideas to make your cake shine!
Garnishes
- Fresh Berries: Top the cake with fresh strawberries or raspberries for a vibrant contrast that adds both flavor and color.
- Mint Leaves: A sprinkle of mint leaves not only adds a pop of green but also offers a refreshing aroma that complements the sweetness of the cake.
Side Dishes
- Vanilla Ice Cream: The creamy, cold texture of vanilla ice cream pairs wonderfully with the richness of the pink velvet cake, creating a delightful combination.
- Fruit Salad: A light fruit salad with seasonal fruits provides freshness and balances the indulgence of the cake perfectly.
- Lemonade: Serve chilled lemonade alongside for a refreshing drink option that enhances the sweet flavors of dessert.
- Coffee or Tea: A warm cup of coffee or herbal tea makes an excellent accompaniment, bringing out the chocolate notes in the cake while offering contrast in temperature.
By following these tips and serving suggestions, you’re sure to create a memorable experience that celebrates mothers everywhere! Enjoy baking and sharing this delightful treat!
Make Ahead and Storage
This Mother’s Day Pink Velvet Cake is perfect for meal prep, allowing you to enjoy sweet moments without the stress of last-minute baking. With a little planning, you can have this delightful cake ready ahead of time!
Storing Leftovers
- Store leftover cake in an airtight container at room temperature for up to 3 days.
- If you live in a humid climate, consider refrigerating it for better preservation.
- Keep the frosted cake covered to maintain its moisture and flavor.
Freezing
- To freeze, ensure the cake is completely cooled and wrapped tightly in plastic wrap.
- Place the wrapped cake in a freezer-safe bag or container for up to 3 months.
- For best results, freeze individual layers instead of the whole cake.
Reheating
- If needed, remove the cake from the freezer and let it thaw overnight in the refrigerator.
- To serve warm, preheat your oven to 300°F (150°C) and place slices on a baking sheet for about 10 minutes.
- Avoid microwaving as it may alter the texture of the cake.
FAQs
Here are some common questions that may help you with your baking adventure!
Can I use a different type of frosting for my Mother’s Day Pink Velvet Cake?
Absolutely! While cream cheese frosting pairs beautifully with this cake, you can try buttercream or whipped cream for a lighter option. Feel free to get creative!
How can I achieve the perfect pink color in my Mother’s Day Pink Velvet Cake?
The key is to gradually add red food coloring until you reach your desired shade. Start with a small amount; you can always add more if needed!
Can I make this Mother’s Day Pink Velvet Cake gluten-free?
Yes! You can substitute regular flour with a gluten-free all-purpose flour blend. Ensure that other ingredients are also gluten-free.
Is it possible to make this cake vegan?
Yes! You can replace eggs with flax eggs or applesauce, and use plant-based butter and non-dairy milk instead of buttermilk.
Final Thoughts
Baking this Mother’s Day Pink Velvet Cake is not just about creating something delicious; it’s about celebrating love and joy with those who matter most. I hope you enjoy making this enchanting dessert as much as I do. May it bring smiles and sweet memories to your table—happy baking!
Mother’s Day Pink Velvet Cake

If you’re searching for a dessert that combines elegance with delightful flavors, look no further than this Mother’s Day Pink Velvet Cake. This enchanting cake features fluffy layers infused with rich cocoa and vanilla, all beautifully tinted with a lovely pink hue. It’s perfect for any celebration, whether you’re honoring Mom on Mother’s Day or simply gathering family and friends. The joy of sharing this cake is sure to create sweet memories that last a lifetime. With simple steps and customizable options, this cake will undoubtedly become a favorite in your home.
- Prep Time: 20 minutes
- Cook Time: 30 minutes
- Total Time: 50 minutes
- Yield: Approximately 12 servings 1x
- Category: Dessert
- Method: Baking
- Cuisine: American
Ingredients
- 2 ½ cups cake flour
- 1 ¾ cups granulated sugar
- ½ cup unsweetened cocoa powder
- 1 tbsp baking powder
- ½ tsp salt
- ¾ cup unsalted butter, softened
- 4 large eggs (room temperature)
- 1 cup buttermilk
- 2 tsp pure vanilla extract
- Red food coloring (for desired pink hue)
- Cream cheese frosting (for topping)
Instructions
- Preheat the oven to 350°F (175°C) and prepare two 9-inch round cake pans by greasing and flouring them.
- In a mixing bowl, whisk together the cake flour, cocoa powder, baking powder, and salt.
- In a separate bowl, cream together the softened butter and sugar until light and fluffy.
- Beat in the eggs one at a time until fully incorporated, then add the buttermilk, vanilla extract, and red food coloring.
- Gradually fold in the dry ingredients until combined without overmixing.
- Divide the batter evenly between the prepared pans and bake for 25-30 minutes or until a toothpick inserted comes out clean.
- Let the cakes cool in their pans for ten minutes before transferring them to wire racks to cool completely.
- Once cooled, frost with cream cheese frosting and enjoy!
Nutrition
- Serving Size: 1 serving
- Calories: 320
- Sugar: 35g
- Sodium: 200mg
- Fat: 15g
- Saturated Fat: 9g
- Unsaturated Fat: 5g
- Trans Fat: 0g
- Carbohydrates: 45g
- Fiber: 1g
- Protein: 4g
- Cholesterol: 70mg