Delicious Christmas Tree & Santa Frosted Brownies Recipe to Make
It’s that magical time of year when festive treats fill the air with deliciousness, and what better way to celebrate than with a mouthwatering dessert like the Christmas Tree & Santa Frosted Brownies Recipe? These delightful brownies aren’t just delicious; they’re a canvas for creativity, bursting with flavors and joyful colors that capture the spirit of the holiday season. Imagine biting into a rich, fudgy brownie topped with fluffy frosting, visually transformed into a whimsical Christmas tree or a cheerful Santa hat. It’s pure bliss on a plate!
Baking these brownies is more than just cooking; it’s about creating memories with loved ones. Picture this: the kids gathering around the kitchen, laughter filling the air as they help decorate the treats. They giggle while attempting to squeeze frosting into tree shapes or adorn the Santa hats with sparkly edible gold stars. This delightful concoction is perfect for holiday parties, family gatherings, or just a cozy night at home. Let’s dive into this festive adventure where every bite promises to be candy-coated joy!
Why You'll Love This Christmas Tree & Santa Frosted Brownies Recipe
- This incredible Christmas Tree & Santa Frosted Brownies Recipe transforms simple everyday ingredients into restaurant-quality flavors that will blow your mind completely.
- Foolproof recipe techniques guarantee perfect results every single time, making even novice cooks feel like professional chefs instantly.
- Stunning visual appeal with gorgeous colors and mouthwatering aromas creates the ultimate Instagram-worthy dish for any special occasion.
- Endlessly adaptable for different dietary needs while working beautifully for meal prep, date nights, or entertaining large groups effortlessly.
Ingredients for Christmas Tree & Santa Frosted Brownies Recipe
Here’s what you’ll need to make this delicious Christmas Tree & Santa Frosted Brownies Recipe:
2 Boxes brownie mix – Choose your favorite brand for a fudgy texture, or make your own for an extra touch of love.
Spray oil for greasing pan – A must to ensure your brownies don’t stick and leave you wrestling with a pan!
1-3 jars white frosting – The base for our colorful creations; buy pre-made or whip up some homemade goodness.
Edible gel food coloring (red and green) – Essential for bringing your brownie decorations to life with vibrant colors.
Edible gold stars – These little gems add a festive touch that truly sparkles.
White pearl sprinkles – Perfect for mimicking shimmering snow on your festive treats.
Icing bags – Handy for piping your frosting designs; a must-have for any aspiring baker.
Frosting tips (large star tip – 1M) – These will help create those lovely star shapes that make your decorations pop.
How to Make Christmas Tree & Santa Frosted Brownies Recipe
Follow these simple steps to prepare this delicious Christmas Tree & Santa Frosted Brownies Recipe:
Step 1: Preheat and Prepare
Preheat your oven as directed on the brownie mix box. While that magical transformation begins, spray a 9-inch springform pan with cooking spray to prevent any sticky situations.
Step 2: Mix and Pour
Combine both boxes of brownie mix following the package instructions, or whip up your favorite homemade recipe. Pour the luscious batter evenly into the prepared springform pan, envisioning the delectable layers you’re about to create.
Step 3: Bake
Bake according to package instructions or until a toothpick inserted in the center comes out clean. If you’re making a double batch, adjust the baking time, keeping an eye on those beauties.
Step 4: Cool and Cut
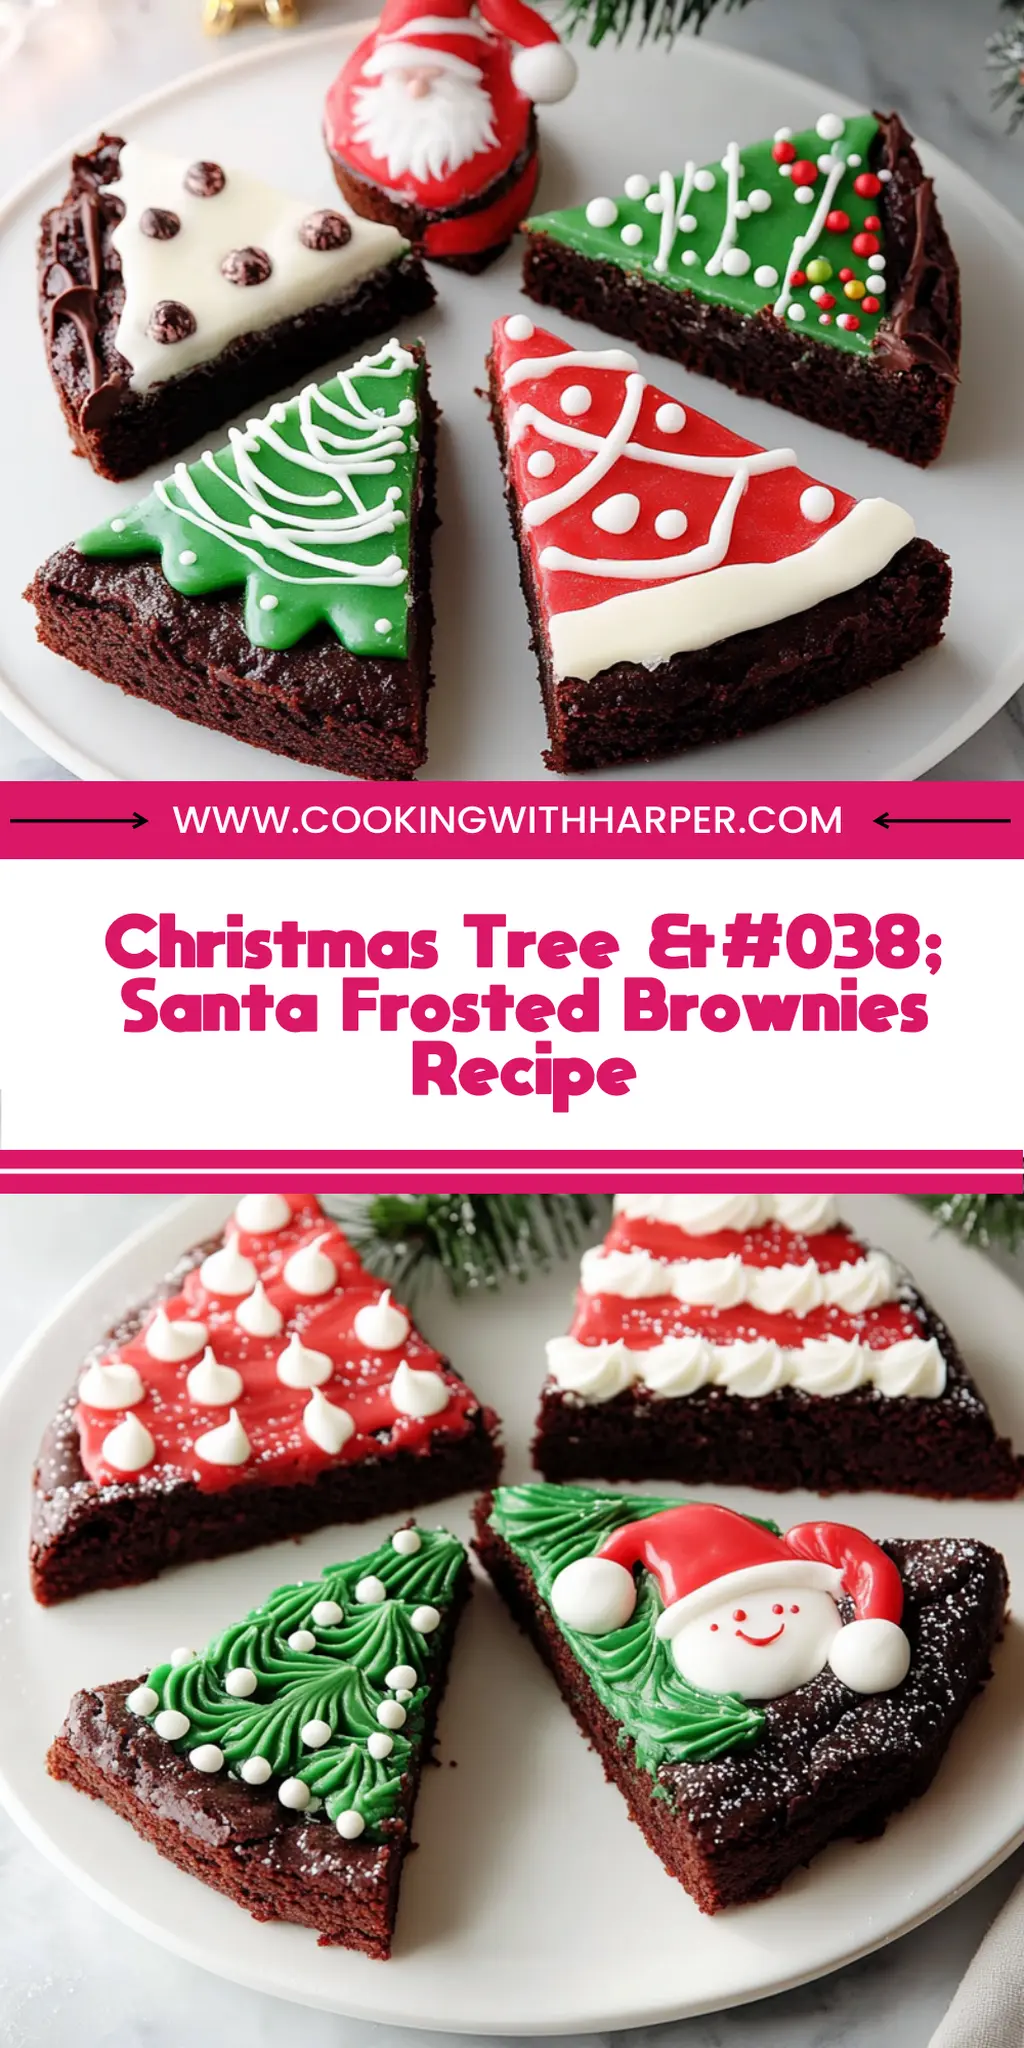
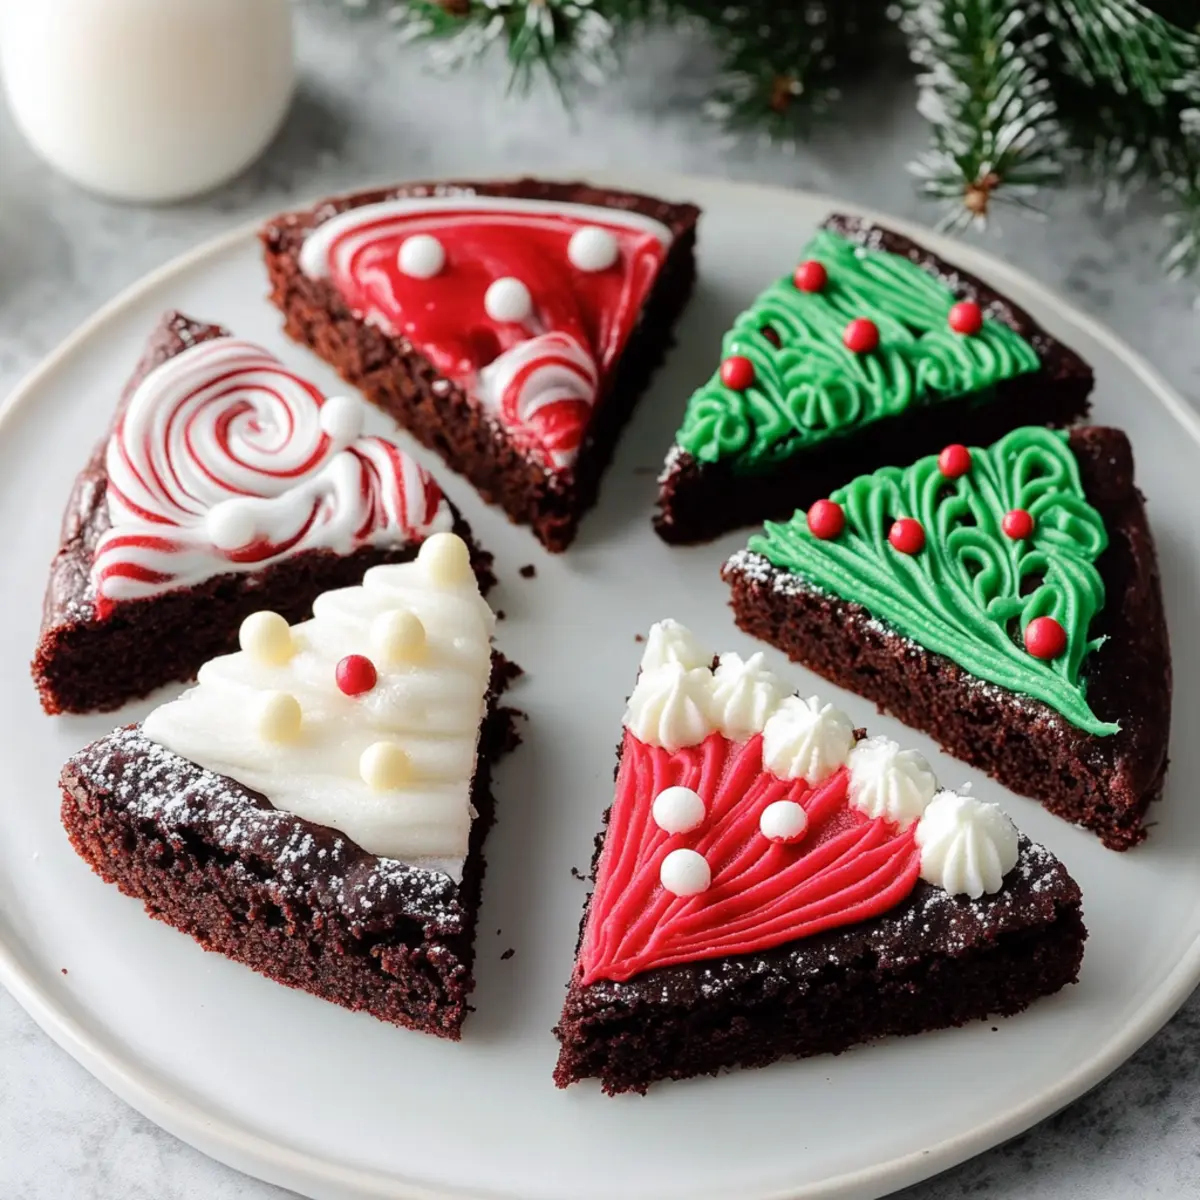
Once the brownies are baked to perfection, let them cool completely. Carefully remove your creation from the springform pan and place it on a cutting board. Cut the brownies into 8 triangular pieces, reminiscent of Christmas trees!
Step 5: Tint Your Frosting
In separate small bowls, tint white frosting with red food coloring in one bowl, and green food coloring in another. Feel free to leave some frosting white for added creativity if you’re feeling adventurous. Mix until you achieve the desired shades and thickness.
Step 6: Decorate!
Fill your icing bags with red, green, and white frostings fitted with large star tips. Use the green frosting to pipe delightful Christmas tree designs atop a few brownies, sprinkling them with white pearl sprinkles and finishing with the golden stars. For a Santa hat decoration, create a combination of green and white frosting to get creative!
Transfer your beautifully decorated brownies to a festive platter and admire your handiwork. Serve and share these iconic Christmas Tree & Santa Frosted Brownies immediately to spread the joy and satisfy your guests’ cravings. Enjoy the laughter and love that comes with each indulgent bite!
You Must Know About Christmas Tree & Santa Frosted Brownies Recipe
- This showstopping Christmas Tree & Santa Frosted Brownies Recipe delivers restaurant-quality results using simple ingredients you probably already have at home.
- The perfect balance of textures and flavors creates an unforgettable dining experience that will have everyone asking for seconds.
- Picture-perfect presentation with vibrant colors makes this dish absolutely Instagram-worthy and guaranteed to impress any dinner guest.
- Incredibly versatile recipe that works beautifully for weeknight dinners, meal prep, special occasions, or even outdoor entertaining sessions.
Perfecting Christmas Tree & Santa Frosted Brownies Recipe Cooking Process
Start by preheating your oven and preparing your pan. While the brownies bake, set out bowls for your frosting colors. Cool, cut, and decorate the brownies in that order for efficiency and a streamlined adventure in brownie-making glory.
Add Your Touch to Christmas Tree & Santa Frosted Brownies Recipe
Feel free to swap out the brownie mix for a homemade recipe or try blondies for a unique twist. You can also experiment with flavors by adding peppermint extract or replacing some sprinkles with crushed candy canes for added crunch.
Storing & Reheating Christmas Tree & Santa Frosted Brownies Recipe
Store your decorated brownies in an airtight container at room temperature for up to five days. If you need to reheat them, pop them in the microwave for 10-15 seconds to restore that fudgy goodness.
Chef's Helpful Tips for Christmas Tree & Santa Frosted Brownies Recipe
- This professional-quality Christmas Tree & Santa Frosted Brownies Recipe relies on precise timing and temperature control to achieve restaurant-standard results consistently.
- Master the art of mise en place by prepping all ingredients beforehand, ensuring smooth execution and preventing any last-minute cooking disasters.
- The secret lies in layering flavors throughout the cooking process rather than seasoning only at the end for maximum depth.
- Pro tip: let the finished dish rest for optimal texture and flavor development before serving to hungry guests waiting eagerly.
It was the Christmas party of a lifetime when I first served these brownies. My friends couldn’t stop raving about them, and I remember one declaring, “These are worth the holiday weight gain!” Their smiles made all the effort worthwhile.
FAQs About Christmas Tree & Santa Frosted Brownies Recipe
What is Christmas Tree & Santa Frosted Brownies Recipe?
The Christmas Tree & Santa Frosted Brownies Recipe is a fun and festive twist on classic brownies that are perfect for the holiday season. These brownies are not only delicious but also visually appealing, decorated with colorful frostings that resemble Christmas trees and Santa hats. They are made easy by using brownie mixes or homemade brownies, topped off with white frosting that you can color with gel food coloring. This charming treat will surely delight both kids and adults at any Christmas gathering.
How long do Christmas Tree & Santa Frosted Brownies last?
You can store your Christmas Tree & Santa Frosted Brownies in an airtight container at room temperature for up to five days. If you’re eager to keep them fresher for longer, consider refrigerating them, where they can last up to a week. Just make sure to let them come to room temperature before serving. Enjoying these delightful brownies a few days after baking can still bring joy and sweetness to the festive season.
Can I customize the flavors in the Christmas Tree & Santa Frosted Brownies Recipe?
Absolutely! One of the best aspects of the Christmas Tree & Santa Frosted Brownies Recipe is its versatility. You can switch out the brownie mix for a homemade recipe or incorporate unique flavors, such as peppermint or espresso. Another fun idea is to replace some sprinkles with crushed candy canes for extra crunch and holiday cheer. Personalizing these brownies allows you to bring your distinct flair to the festive treat.
What occasions are suitable for serving Christmas Tree & Santa Frosted Brownies?
The Christmas Tree & Santa Frosted Brownies are ideal for a variety of festive occasions, ranging from Christmas parties to holiday potlucks. Their playful design and delicious taste make them a hit at family gatherings, cookie exchanges, or even as a sweet treat for friends. Whether you’re looking to impress guests or spread seasonal cheer, these brownies will undoubtedly steal the show and evoke smiles all around.
Conclusion for Christmas Tree & Santa Frosted Brownies Recipe
The Christmas Tree & Santa Frosted Brownies Recipe is a delightful and creative way to celebrate the holiday season. With simple ingredients and an engaging preparation process, these festive brownies attract attention and satisfy taste buds. From their vibrant colors to their fantastic flavors, they are sure to become a favorite treat at holiday gatherings. Don’t hesitate to embrace your creativity with this recipe and share the joy of holiday baking with friends and family.
Christmas Tree & Santa Frosted Brownies
Ingredients
Equipment
Method
- Preheat your oven as directed on the brownie mix box. Spray a 9-inch springform pan with cooking spray to prevent sticking.
- Combine both boxes of brownie mix or prepare a double batch of homemade brownies following your recipe or package instructions. Pour the batter evenly into the prepared springform pan.
- Bake according to package instructions or until a toothpick inserted in the center comes out clean. For a double batch, baking time may be longer than usual.
- Once baked, allow brownies to cool completely. Remove from the springform pan and place on a cutting board. Cut the brownies into 8 triangular pieces.
- In separate small bowls, tint white frosting with red food coloring in one bowl and green food coloring in another. Leave some frosting white. Adjust the amount of coloring for desired shade and amount of frosting thickness.
- Dispense red, green, and white frostings into individual icing bags fitted with large star tips (1M).
- Use green frosting to create Christmas tree designs on some brownies, decorating with white pearl sprinkles and edible gold stars. For Santa hat brownies, combine green and white frosting for decoration.
- Serve decorated brownies immediately and enjoy your festive treats!