Christmas Snowball Cookies
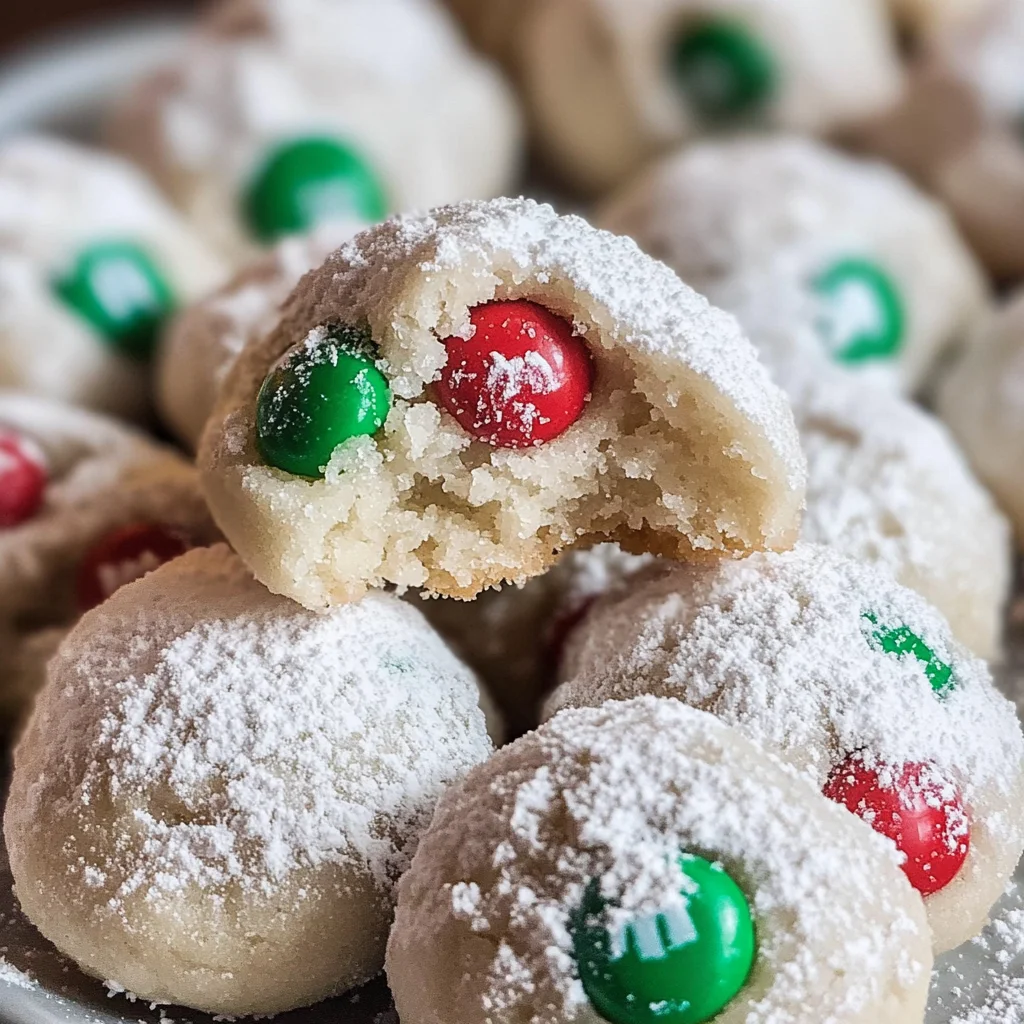
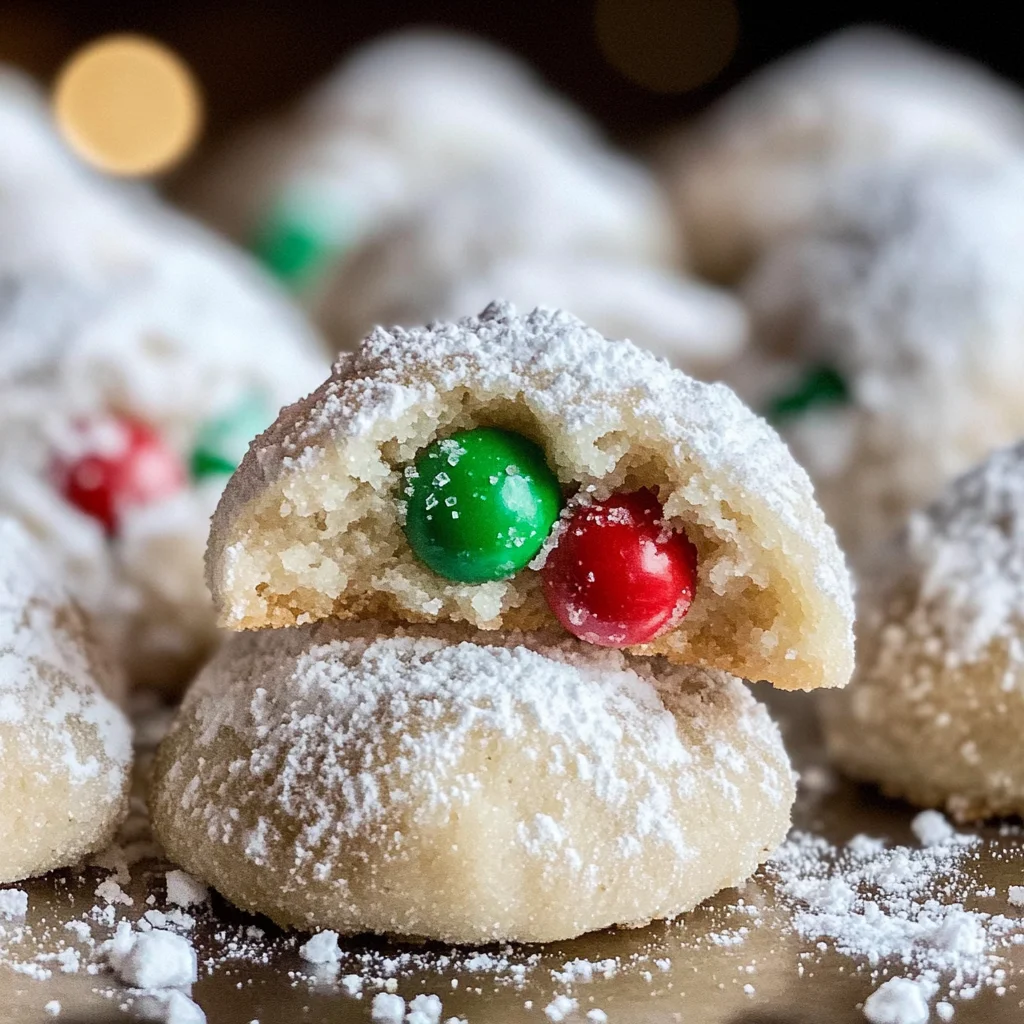
If you’re looking for a delightful treat to brighten up your holiday season, you’ve come to the right place! Christmas Snowball Cookies are a cherished recipe from my mom that never fails to bring joy. The vibrant red and green M&Ms make these cookies not just delicious but also a feast for the eyes. Whether you’re baking for family gatherings, holiday parties, or just for yourself, these cookies are sure to become a favorite in your home.
What I love about this recipe is how easy it is! You can whip up a batch in no time, making them perfect for busy weeknights or spontaneous get-togethers. Plus, they’re fun to make with kids—rolling the cookies in powdered sugar always brings giggles and smiles!
Why You’ll Love This Recipe
- Quick and Easy: With just a few simple steps, you’ll have cookies ready to share in under 30 minutes.
- Family-Friendly Fun: Kids will enjoy helping mix and roll these sweet treats—it’s a great way to make memories!
- Customizable Colors: Use any color of M&Ms to match your holiday theme or personal preference.
- Make Ahead: These cookies freeze beautifully, so you can prepare them in advance and enjoy them later.
- Irresistibly Delicious: The buttery goodness paired with chocolatey crunch makes every bite heavenly!
Ingredients You’ll Need
Let’s gather our simple, wholesome ingredients for these delightful Christmas Snowball Cookies. You might already have many of these items in your pantry!
For the Cookies
- 1 cup (226g) unsalted butter (slightly softened)
- ½ cup (57g) powdered sugar (do NOT pack your powdered sugar)
- 1 teaspoon vanilla
- 2 ¼ cups (279g) all purpose flour (do NOT pack your flour)
- ½ teaspoon salt
- 1 cup mini M&Ms (any color)
- Additional powdered sugar (for rolling)
Variations
This recipe is wonderfully flexible! Feel free to play around with the ingredients and put your spin on it.
- Switch Up the Candy: Use different types of chocolate candies or even festive sprinkles for a unique touch.
- Add Nuts: Mix in some chopped nuts like walnuts or pecans for extra crunch and flavor.
- Flavor Boost: Experiment with almond extract instead of vanilla for a slightly different flavor profile.
- Go Gluten-Free: Substitute the all-purpose flour with a gluten-free blend if you need a gluten-free option.
How to Make Christmas Snowball Cookies
Step 1: Preheat and Prepare
Preheat your oven to 350°F (175°C) and line two cookie sheets with parchment paper. This step ensures even baking and makes cleanup easier!
Step 2: Cream the Butter Mixture
In a mixing bowl, beat together the slightly softened butter, ½ cup of powdered sugar, and vanilla until fluffy. This process is important because it adds air into the mixture, making your cookies light and tender. When combined well, add the flour and salt. Mix until everything comes together into a dough—you might need to get your hands in there if it’s not coming together smoothly!
Step 3: Incorporate M&Ms
Once your dough is ready, fold in those colorful mini M&Ms. They not only add sweetness but also give those cheerful bursts of color that make these cookies so special.
Step 4: Shape the Cookies
Scoop out tablespoon-sized balls of dough and place them on your prepared cookie sheets. Leave some space between each ball as they will spread slightly while baking—this helps them bake evenly.
Step 5: Bake Until Golden
Bake the cookies in your preheated oven for 8-10 minutes until the bottoms are just lightly browned. After baking, let them cool on the sheets for about 5-10 minutes before rolling them in powdered sugar—this step is crucial because it creates that beautiful snowball effect!
Step 6: Cool Down
Transfer the coated cookies onto a wire rack to cool completely. Once cooled, if you like an extra sugary finish, feel free to roll them again in powdered sugar before serving.
And there you have it! A batch of scrumptious Christmas Snowball Cookies that will fill your home with warmth and cheer during this festive season. Enjoy every bite!
Pro Tips for Making Christmas Snowball Cookies
Making Christmas Snowball Cookies is a joy, and with these simple tips, you’ll ensure your cookies turn out perfectly every time!
- Use room temperature butter: This helps the butter to cream better with the sugar, resulting in a fluffy texture that makes for a lighter cookie.
- Don’t skip chilling the dough: If you’re in a warm environment or if the dough feels too soft, chill it in the fridge for 30 minutes. This helps the cookies hold their shape while baking.
- Scoop evenly: Use a cookie scoop to ensure each cookie is the same size. This ensures even baking and makes for a beautiful presentation.
- Watch the baking time: Every oven is different! Keep an eye on your cookies as they bake; they should be lightly golden on the bottom but still soft on top when you take them out.
- Re-roll after cooling: For an extra touch of sweetness, roll the cooled cookies in powdered sugar again before serving. It gives them that snowy appearance and makes them even more delightful!
How to Serve Christmas Snowball Cookies
Presenting your Christmas Snowball Cookies can be just as fun as making them! Here are some ideas to make your holiday table shine.
Garnishes
- Dust with colored sugar: A sprinkle of red or green colored sugar on top adds a festive touch that’s perfect for celebrations.
- Serve with fresh mint leaves: The bright green of mint leaves not only looks lovely but also adds a refreshing contrast to the sweetness of the cookies.
Side Dishes
- Hot cocoa: A warm cup of hot cocoa pairs beautifully with these cookies. The rich chocolate flavor complements the sweet and buttery taste of the snowballs perfectly.
- Fruit salad: A light fruit salad balances out the sweetness of the cookies. Consider using seasonal fruits like cranberries and oranges for a burst of flavor!
- Cheese platter: A variety of cheeses can provide a savory contrast. Include soft cheeses like brie along with crackers for a delightful combination with your sweet treats.
- Coffee or tea: Offering coffee or tea creates a cozy atmosphere where guests can enjoy their cookies while sipping on warm beverages, making it an ideal pairing for holiday gatherings.
With these tips and serving ideas, your Christmas Snowball Cookies will surely be a hit at any holiday gathering! Enjoy baking and sharing this sweet treat with loved ones!
Make Ahead and Storage
These Christmas Snowball Cookies are perfect for meal prep! You can whip up a batch ahead of time, ensuring you have delicious treats ready for holiday gatherings or cozy nights at home.
Storing Leftovers
- Store the cookies in an airtight container at room temperature.
- They’ll stay fresh for about 5 days, but I bet they won’t last that long!
Freezing
- Allow the cookies to cool completely before freezing.
- Place them in a single layer in an airtight container or freezer bag.
- They can be frozen for up to one month. When ready to eat, thaw at room temperature.
Reheating
- If you’d like to enjoy them warm, pop them in the microwave for about 10-15 seconds.
- Alternatively, reheat in a preheated oven at 300°F (150°C) for about 5 minutes.
FAQs
Here are some common questions about making and enjoying Christmas Snowball Cookies.
Can I use different types of M&Ms in Christmas Snowball Cookies?
Absolutely! You can customize these cookies with any color or type of M&Ms you prefer. It’s a fun way to match your holiday theme!
How do I make these Christmas Snowball Cookies gluten-free?
To make gluten-free Christmas Snowball Cookies, simply substitute the all-purpose flour with a gluten-free flour blend that measures cup-for-cup like regular flour.
Can I make Christmas Snowball Cookies ahead of time?
Yes! These cookies actually taste great when made ahead. Just follow the storage instructions to keep them fresh until you’re ready to serve.
What is the best way to store my Christmas Snowball Cookies?
Store your cookies in an airtight container at room temperature for optimal freshness. They should last about 5 days!
Final Thoughts
I hope you’re as excited as I am about making these delightful Christmas Snowball Cookies! With their festive colors and melt-in-your-mouth texture, they’re sure to bring joy to your holiday season. Whether enjoyed with family or shared with friends, these cookies are bound to create sweet memories. Enjoy baking them and happy holidays!
Christmas Snowball Cookies
Delight in these festive Christmas Snowball Cookies made with colorful M&Ms. Perfect for sharing during the holidays—try this easy recipe today!
- Prep Time: 10 minutes
- Cook Time: 10 minutes
- Total Time: 20 minutes
- Yield: Approximately 24 cookies 1x
- Category: Dessert
- Method: Baking
- Cuisine: American
Ingredients
- 1 cup (226g) unsalted butter (slightly softened)
- ½ cup (57g) powdered sugar (do NOT pack your powdered sugar)
- 1 teaspoon vanilla
- 2 ¼ cups (279g) all purpose flour (do NOT pack your flour)
- ½ teaspoon salt
- 1 cup mini M&Ms (any color)
- Additional powdered sugar (for rolling)
Instructions
- Preheat your oven to 350°F (175°C) and line two cookie sheets with parchment paper.
- In a mixing bowl, cream together softened butter, powdered sugar, and vanilla until fluffy. Gradually add flour and salt until well combined.
- Fold in the mini M&Ms gently until evenly distributed throughout the dough.
- Scoop out tablespoon-sized balls of dough onto the prepared sheets, leaving space between each cookie.
- Bake for 8-10 minutes until the bottoms are lightly browned. Allow to cool slightly before rolling in powdered sugar.
- Transfer to a wire rack to cool completely; re-roll in powdered sugar if desired before serving.
Nutrition
- Serving Size: 1 cookie
- Calories: 90
- Sugar: 3g
- Sodium: 35mg
- Fat: 6g
- Saturated Fat: 4g
- Unsaturated Fat: 2g
- Trans Fat: 0g
- Carbohydrates: 9g
- Fiber: 0g
- Protein: 1g
- Cholesterol: 15mg