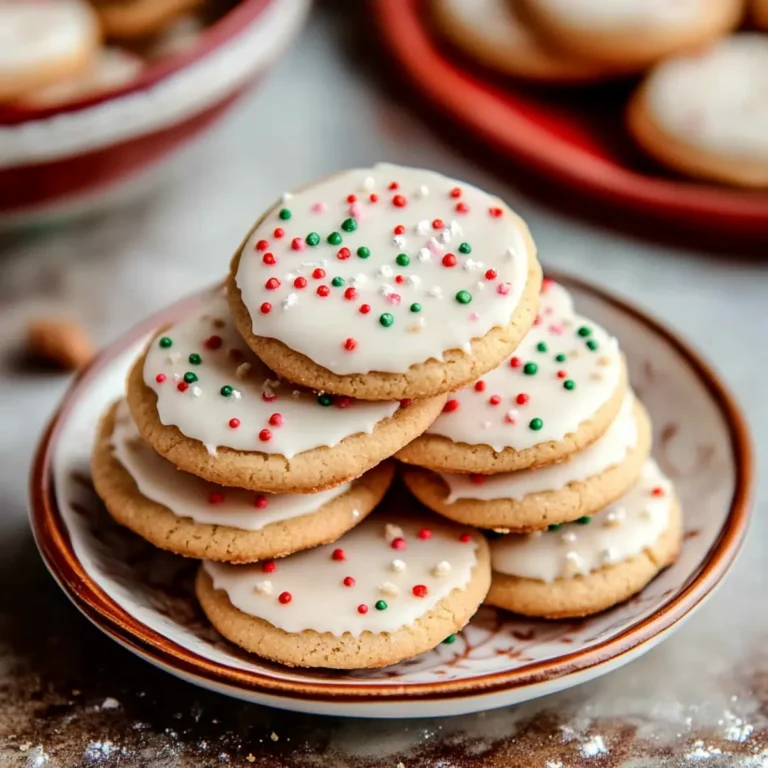
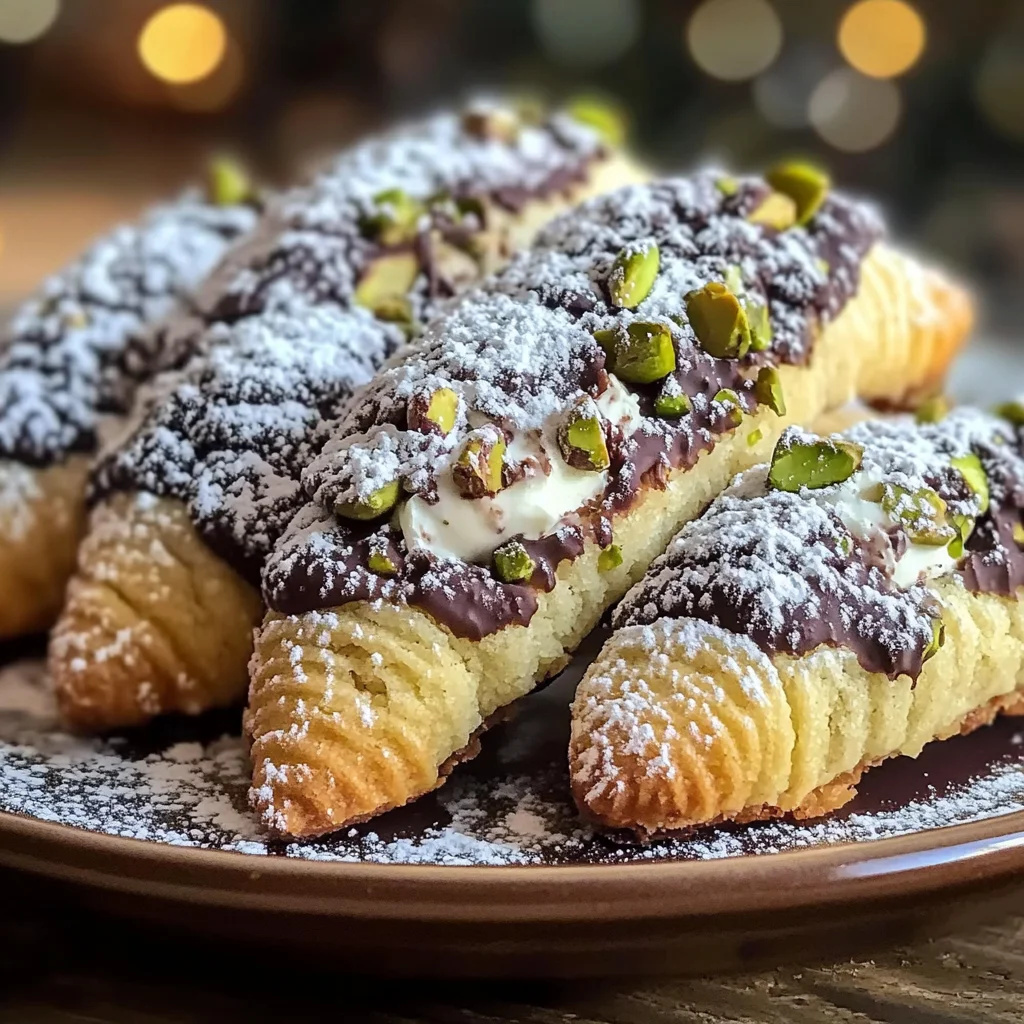
Cannoli Cookies
If you’re looking for a treat that perfectly blends crispy and creamy, then you’re in for a delightful surprise with Cannoli Cookies! This recipe has quickly become a favorite in my household. The sweet ricotta filling nestled inside a delicate, buttery shell is simply irresistible. Whether it’s a busy weeknight or a family gathering, these cookies make any occasion feel special.
What I love most about Cannoli Cookies is how easy they are to whip up. They bring a touch of indulgence without requiring hours in the kitchen. Plus, they’re perfect for sharing—or keeping all to yourself! Trust me, once you take that first bite, you’ll understand why these cookies hold such a special place in my heart.
Why You’ll Love This Recipe
- Quick and Easy: With just 30 minutes of prep time, you’ll have delicious cookies ready in no time.
- Family-Friendly: These Cannoli Cookies are sure to please both kids and adults alike—everyone loves that creamy filling!
- Make-Ahead Convenience: You can prepare the dough ahead of time and bake when you’re ready for a sweet treat.
- Delicious Flavor: The combination of ricotta, vanilla, and lemon zest creates a flavor explosion that will leave you wanting more!
Ingredients You’ll Need
Let’s gather some simple, wholesome ingredients to create our Cannoli Cookies. These items are easy to find and come together beautifully to make this delightful dessert!
Ingredients:
– 1 cup (240 ml) of all-purpose flour
– ½ cup (100 g) of granulated sugar
– ½ cup (120 g) of ricotta cheese
– 1 large egg
– 1 tsp of vanilla extract
– 1 tsp of lemon zest
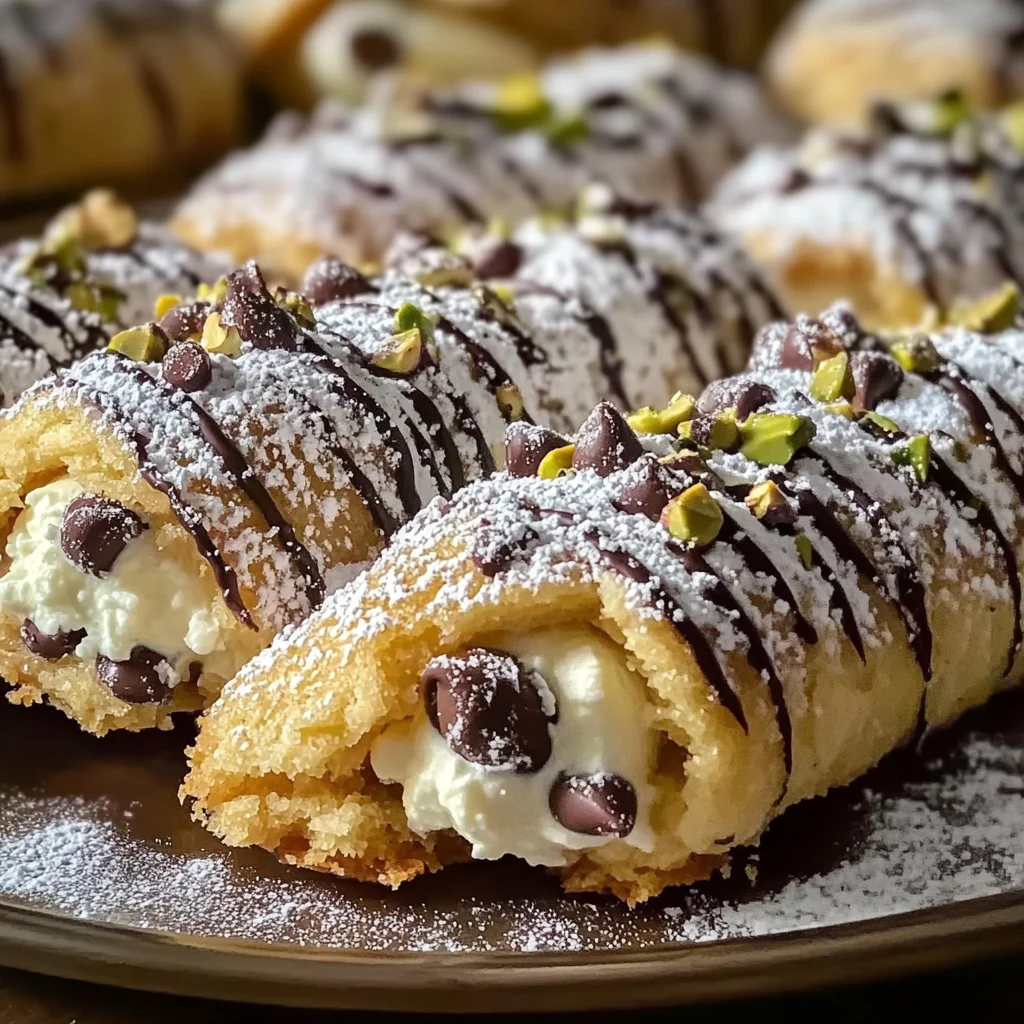
– ½ cup (75 g) of mini chocolate chips
– ½ cup (75 g) of chopped pistachios
– Powdered sugar for dusting
Variations
One of the best things about Cannoli Cookies is their flexibility! Feel free to get creative and make them your own with these fun variations:
- Add some spice: Consider adding a pinch of cinnamon or nutmeg to the dough for extra warmth.
- Try different fillings: Swap out the chocolate chips or pistachios for dried fruit or nuts you love!
- Make them gluten-free: Use a gluten-free flour blend instead of all-purpose flour to accommodate dietary needs.
- Flavor twist: Experiment by adding orange zest instead of lemon for a refreshing citrus note.
How to Make Cannoli Cookies
Step 1: Preheat Your Oven
Preheating your oven to 350°F (175°C) is essential. This ensures that your cookies bake evenly and develop that lovely golden color.
Step 2: Mix Dry Ingredients
In a large bowl, whisk together the flour and sugar until well blended. This step combines the dry ingredients seamlessly, which helps avoid lumps later on.
Step 3: Combine Wet Ingredients
In another bowl, mix together the ricotta cheese, egg, vanilla extract, and lemon zest until smooth. This mixture brings all those lovely flavors together and forms the base for your cookie dough.
Step 4: Create the Dough
Gradually stir your dry mixture into the wet ingredients until a soft dough forms. It’s important not to overmix; we want tender cookies!
Step 5: Rest the Dough
Cover the dough and let it rest for about 30 minutes. This resting period allows the gluten in the flour to relax, resulting in a more tender cookie.
Step 6: Prepare Baking Sheets
Line your baking sheets with parchment paper. This prevents sticking and makes cleanup much easier—always a win!
Step 7: Roll Out the Dough
Dust your work surface with flour and roll out the dough to about ¼ inch thick. Rolling it out evenly will help ensure that all your cookies bake uniformly.
Step 8: Cut Out Shapes
Cut the dough into rectangles or squares approximately 2×3 inches. Make sure they are similar sizes for even baking.
Step 9: Prepare Filling
In a small bowl, mix together ricotta cheese, mini chocolate chips, and chopped pistachios. This delicious filling will be bursting with flavor!
Step 10: Fill Each Cookie
Place a spoonful of filling in the center of each rectangle and fold it over to seal. Make sure they are sealed well so none of that delicious filling escapes during baking.
Step 11: Bake
Bake your cookies for about 15-18 minutes until golden brown. The smell wafting through your kitchen will be heavenly!
Step 12: Cool Down
Let your cookies cool on baking sheets for a few minutes before transferring them to a wire rack. This allows them to firm up just enough before enjoying!
Now that you have this delightful recipe for Cannoli Cookies at your fingertips, I hope you enjoy making—and devouring—these little bites of joy as much as I do!
Pro Tips for Making Cannoli Cookies
Creating the perfect Cannoli Cookies is easier than you might think. With a few simple tips, you can elevate your baking game and impress your friends and family!
- Use fresh ricotta: Fresh ricotta cheese adds a creaminess that enhances the filling’s flavor and texture. Opting for quality ingredients makes all the difference in this dessert.
- Chill your dough: Allowing the dough to rest not only helps with flavor development but also makes it easier to roll out. A chilled dough is less sticky and will hold its shape better during baking.
- Experiment with fillings: While the classic chocolate chip and pistachio filling is delightful, don’t hesitate to try other variations like adding dried fruits, different nuts, or even a touch of cinnamon for added warmth.
- Watch the baking time: Every oven is different! Keep an eye on your Cannoli Cookies as they bake; they should be golden brown. If you let them go too long, they might become too crispy instead of having that perfect delicate crunch.
- Dust with powdered sugar before serving: Adding a light dusting of powdered sugar not only looks beautiful but also gives a subtle sweetness that perfectly complements the creamy filling.
How to Serve Cannoli Cookies
Serving Cannoli Cookies can be just as fun as making them! Here are some ideas to present these little delights that will surely impress your guests.
Garnishes
- Chocolate drizzle: A simple drizzle of melted dark chocolate over the cookies adds an elegant touch and enhances their indulgent nature.
- Citrus zest: Sprinkle some extra lemon or orange zest on top for a refreshing burst of flavor that balances the sweetness.
Side Dishes
- Fresh fruit salad: A colorful mix of seasonal fruits adds a refreshing contrast to the rich flavors of Cannoli Cookies, making for a well-rounded dessert experience.
- Vanilla ice cream: Serve alongside a scoop of vanilla ice cream for an extra creamy treat that pairs beautifully with the cookies’ textures.
- Espresso or coffee: The rich flavors of espresso or a warm cup of coffee complement the sweetness of Cannoli Cookies perfectly, enhancing your dessert experience.
- Whipped coconut cream: For those looking for a dairy-free option, serve with whipped coconut cream. Its lightness and slight sweetness harmonize wonderfully with the cookies.
Now that you have all these wonderful ideas, it’s time to gather your ingredients and get baking! Enjoy every delicious bite of these delightful Cannoli Cookies.
Make Ahead and Storage
These Cannoli Cookies are not only a treat to bake but also perfect for meal prep! You can easily store or freeze them, ensuring you have this delightful dessert on hand whenever a craving strikes.
Storing Leftovers
- Allow the cookies to cool completely before storing.
- Place them in an airtight container at room temperature for up to 3 days.
- For longer storage, keep them in the refrigerator where they will last for up to a week.
Freezing
- To freeze, place fully cooled cookies in a single layer on a baking sheet and freeze until solid.
- Once frozen, transfer them to a freezer-safe bag or container, separating layers with parchment paper.
- They can be stored in the freezer for up to 3 months.
Reheating
- To enjoy your cookies warm, preheat your oven to 300°F (150°C).
- Place the cookies on a baking sheet and heat for about 5-7 minutes.
- Alternatively, microwave for 10-15 seconds for a quick warm-up.
FAQs
Have questions about making Cannoli Cookies? Here are some common queries!
Can I use other cheeses instead of ricotta in Cannoli Cookies?
Yes! While ricotta is traditional, you can try using mascarpone or cottage cheese for a different flavor profile.
How do I ensure my Cannoli Cookies stay crispy?
To maintain their crispiness, avoid adding too much moisture to the filling and store them properly as outlined above.
Can I make Cannoli Cookies ahead of time?
Absolutely! You can prepare the dough and filling separately in advance. Just assemble and bake when you’re ready to enjoy!
What other fillings can I use for Cannoli Cookies?
Feel free to experiment with various fillings like cream cheese mixed with fruit preserves or whipped cream combined with nuts for added texture.
Final Thoughts
I hope you find joy in making these Cannoli Cookies as much as I do! Their unique combination of textures and flavors makes them truly special and irresistible. Whether you’re serving them at a gathering or enjoying them at home, these cookies are sure to delight. So grab your ingredients and let your creativity shine—happy baking!
Cannoli Cookies

Indulge in the delightful world of Cannoli Cookies, where a crispy exterior meets a creamy ricotta filling for an irresistible treat. These cookies are a fantastic blend of textures and flavors, perfect for any occasion—from busy weeknights to festive gatherings. With just 30 minutes of prep time, you can whip up these scrumptious bites that are sure to please both kids and adults alike. The sweet ricotta, accented with vanilla and lemon zest, creates a flavor explosion that will leave you craving more. Whether you choose to share or keep them all to yourself, Cannoli Cookies are simply divine!
- Prep Time: 30 minutes
- Cook Time: 15 minutes
- Total Time: 45 minutes
- Yield: Approximately 12 cookies 1x
- Category: Dessert
- Method: Baking
- Cuisine: Italian
Ingredients
- 1 cup all-purpose flour
- ½ cup granulated sugar
- ½ cup ricotta cheese
- 1 large egg
- 1 tsp vanilla extract
- 1 tsp lemon zest
- ½ cup mini chocolate chips
- ½ cup chopped pistachios
- Powdered sugar for dusting
Instructions
- Preheat your oven to 350°F (175°C).
- In a large bowl, whisk together flour and sugar.
- In another bowl, mix ricotta, egg, vanilla extract, and lemon zest until smooth.
- Gradually combine the dry ingredients into the wet mixture until a soft dough forms.
- Cover the dough and let it rest for 30 minutes.
- Line baking sheets with parchment paper.
- Roll out the dough to about ¼ inch thick on a floured surface.
- Cut the dough into rectangles (2×3 inches).
- Mix ricotta cheese with mini chocolate chips and chopped pistachios in a small bowl.
- Place filling in the center of each rectangle and fold over to seal.
- Bake for 15-18 minutes until golden brown.
- Cool on baking sheets briefly before transferring to wire racks.
Nutrition
- Serving Size: 1 cookie (30g)
- Calories: 120
- Sugar: 7g
- Sodium: 50mg
- Fat: 5g
- Saturated Fat: 2g
- Unsaturated Fat: 3g
- Trans Fat: 0g
- Carbohydrates: 17g
- Fiber: <1g
- Protein: 2g
- Cholesterol: 20mg